Apple City Barbecue Grand World Champion Ribs

I'm assuming that by now you are armed with a spice grinder and a homemade, world class rub. If you're not, you should know that I am very disappointed with you. I mean, you had two days to get this together, how much more time and motivation do you need?!!?! Well, if it is a matter of motivation, how about making something insanely delicious out of that rub...something like Mike Mill's Apple City Barbecue Grand World Champion Ribs?
These are by far my favorite ribs to make, and more so to eat. These are the ribs that I set out to attempt to duplicate when I first started to barbecue, and once the recipe was published, these are the ones I made over and over to come to the perfect homemade rib. It has literally taken me years to come anywhere close to Mike Mill's , but I've finally made it into the realm of a suitable rib, something that's both familiar and unique at the same time and, most importantly, impossible to stop eating.
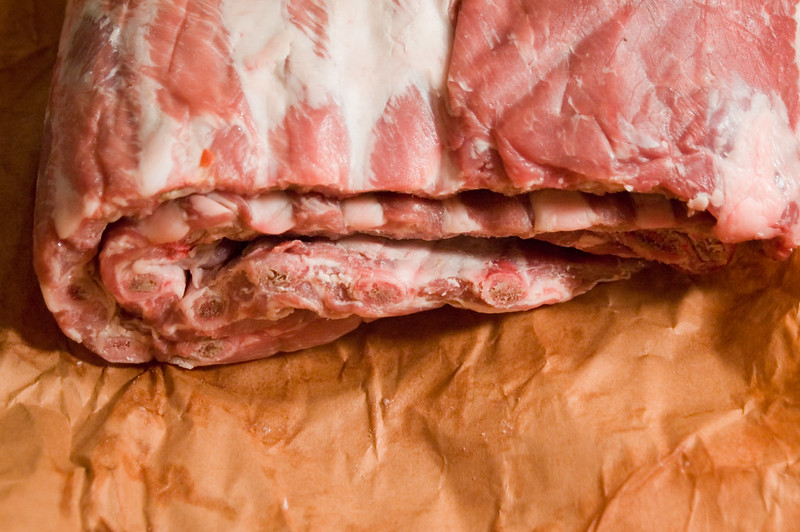
I really like this recipe using lion (baby) backs, but those are not as economical as spare ribs when cooking for a crowd, so I mostly opt for the later cut. Start by removing the thin membrane that's attached to the bone side of the rib. This is tricky at first, but it's worth doing yourself and gets easier after a few tries. I do this by jamming the dull side of a knife under the membrane to loosen a corner, then holding that corner with a paper towel, I pull the entire membrane from the ribs in one smooth motion. I once asked the butcher at Whole Food's to do this for me, only to be laughed at and told "Ribs don't have brains." If you don't want to do this yourself and your butcher says that, find another butcher, and, for the record, I no longer buy my meat from Whole Foods. After removing the membrane, trim any excess fat and loose meat from the racks.
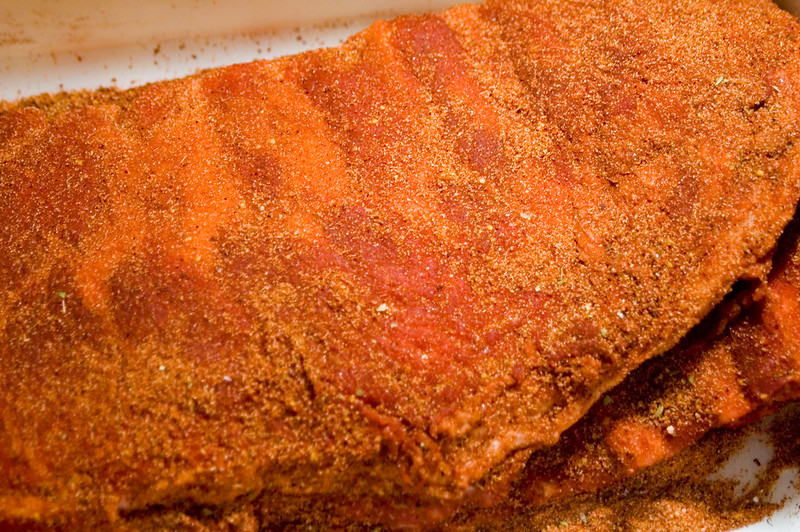
Now take that beautiful rub you made and sprinkle it very liberally all over the ribs, on all sides. Rub the seasoning into the meat with your hands, I find wearing latex gloves helps with this a lot. Keep adding more rub if you see any empty or thin areas of covering. At this point my kitchen smells of barbecue (or bbq preparation anyway), the ribs start looking like bbq, and cravings ensue. There's been times when my desire for barbecue has been so strong that I started to dip other foods into the rub, or even just take a small taste of the it with spoon, to satisfy this sudden and intense urge. Once you've finish rubbing the ribs, cover or wrap in plastic wrap and let them sit in the fridge overnight, they'll be more flavorful and tender this way.
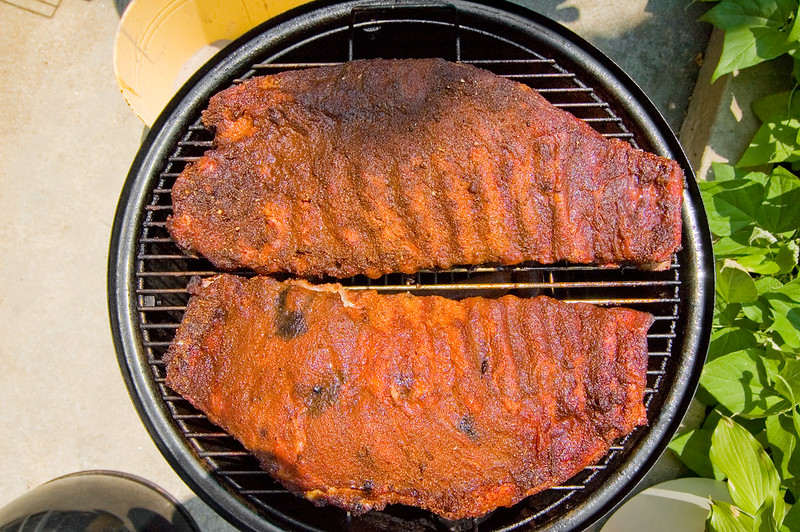
It's a long wait, but after a night in the fridge, it's finally time to start smoking. It's important to have the ribs at room temperature before putting them in the smoker. It takes me about an hour to start the fire and get the smoker to 225, so I always just take them out right before I start that process. The right amount of smoke is one of the elements that took me a while to get right. I often found the smoke flavor would end up too strong or too weak, and never left a truly delicious rib. My solution was to use a mix of two woods, 4-5 chunks of apple wood, which is mild and sweet, along with 2 chunks of oak, which is heavier and leaves the more distinct smoke flavor in the meat. Sometimes I even add a couple more chunks of apple wood during the cooking if I notice all the original pieces have burnt away.
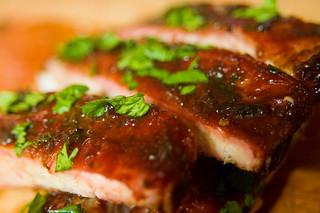
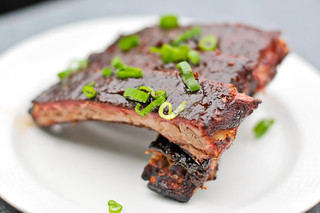
Getting the time perfect was another problem area for years. I always smoke ribs at 225 and patience is key for getting it right at this temperature. I've tried smoking a little higher (250 degrees), but ended up with tougher meat. I've also tried a little lower (200 degrees), but I found it harder to maintain that temperature in my smoker, plus the little extra wait is excruciating. So keep the smoker at 225 the entire cooking time. I don't lift the cover at all for first 2 hours of cooking, this helps maintain the temperature and keep the strongest smoke in the smoker, as well as letting the ribs get a good start on cooking. After the first 2 hours, I check on them every hour, always spraying the racks heavily apple juice every time I open the lid (if you're going to open the lid and lose cooking time, might as well get something out of it). I start checking for doneness at 5 hours. I've found the meat does not pull away from rib much when cooked correctly, so I test them by lifting one side of the ribs to see if there's a bend or give in the middle of the rack. My spare ribs seem to take 6-7 hours to get to the right state of tenderness, lion backs take about 1/2 of that time or even less. When I notice the ribs are done, or just about done, I baste lightly with the sauce and let cook an extra 10-15, or until the sauce has thickened and caramelized.
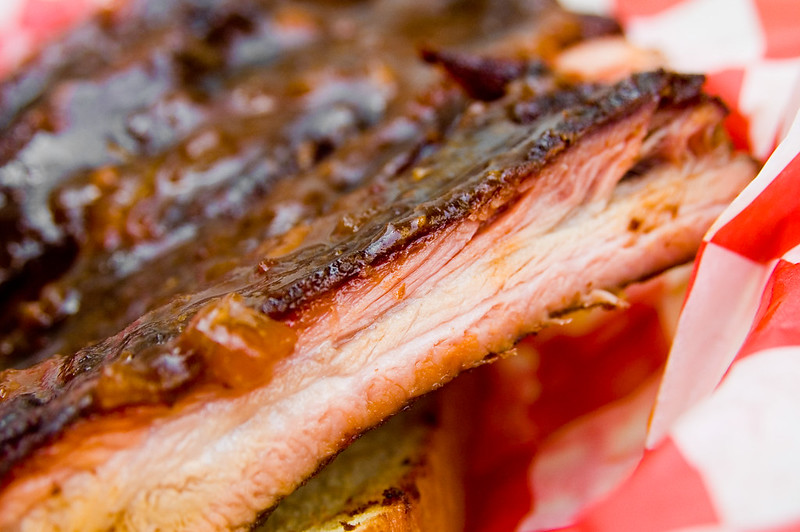
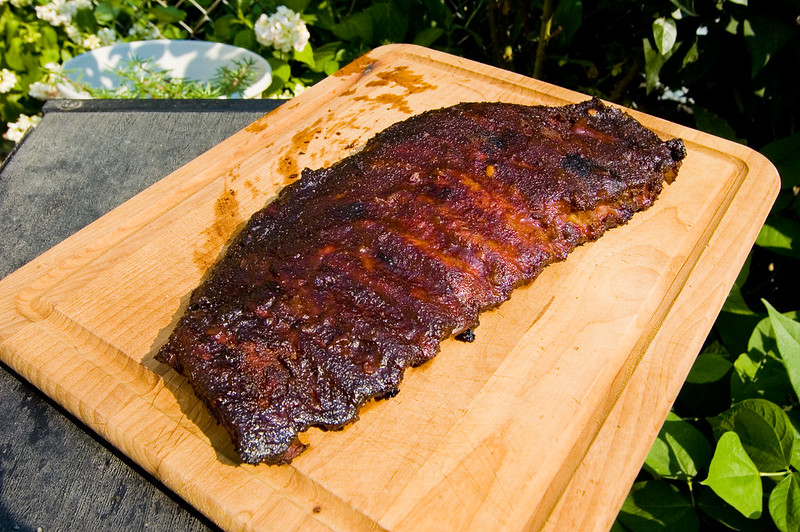
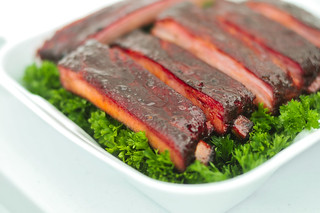
So the racks are done and beautiful, just cut and serve with extra sauce to taste. I have never made a rib that is fall-off-the-bone tender. I've read this usually happens when you parboil ribs before barbecuing them, which seems so very wrong and something I would never do making barbecue. Instead the meat sticks to the bone (when I tear two ribs apart, they tear down the middle, with the meat staying attach to each respective bone), but comes off easily and cleanly when tearing into them with your teeth. With finally getting the amount of smoke right, I get a nice smoke ring on these ribs, that is the pink part of the meat near the surface, caused by a reaction with the smoke. So years of practice pays off with ribs I can proudly serve and eat as real delicious barbecue. I'm content for now with getting the Apple City ribs right, but that probably won't last long, and it'll be time for me to start a-new, devising my own recipe to have a rib I can truly call my own.
You Might Also Like
Comments
-
jamie mcneel hey my friend ...I bake my ribs at 350 in the oven in apple juice for 3 hours then smoke with rub on them ...its is the best way to cook ribs I have ever found....jamie mcneel from childersburg alabama
-
Chris Tucker My first ribs turned out to be a disaster, lots of cleaning up tyhe BBQ here in Tampa
-
Stefano Loretto how long would you cook for very meaty baby backs?
Thanks -
Roger brandt I agree with Jamie McNeel, I do my ribs in the oven @ 300 for 4 hours with apple juice and garlic, then smoke them for 3 hours, I then put them in foil with a few tbs of apple cider vinegar, for another hour, then I'll either put rub on or throw them on bbq and put bbq sauce on, best ribs I've ever had. And everybody that tries them.
-
David Thanks for posting all these awesome recipes. I tried many of them and never been disappointed. I have a question, since the ribs are sprayed with Apple juice throughout the cooking process, do you add water in the smoker pan or just leave it dry? I have a Weber WBS smoker and I always use water but for this recipe i am not sure if water is needed. Thx
-
Jeff S Roger are they completely submerged in juice while in oven .? Or some in pan for hidity. Thanx