A KettlePizza Party

I'm not sure if I'd consider myself a true pizza aficionado—I couldn't tell you the hydration ratios of different doughs or the exact diameter of a classical Neapolitan pie—but like most Americans, I couldn't live without the stuff. I've eaten so much pizza at this point that I can certainly separate the exceptional from the merely very good (anything less is not worth eating in New York, except for the couple times a year I cheat and order in Papa Johns to fulfill some suburban longings). So take my love for cooking and fondness for pizza, and it makes sense that I'd be into trying to make this pillar of cuisine at home.
It's an unfortunate and harsh reality then that truly great pizza is often out of reach for the home cook, and I've spent years solidifying that fact to myself by cooking pizza in an oven with inadequate temperature to achieve desired results. So when the invention of KettlePizza came to my attention, I took attentive notice. It seemed like this kettle grill to pizza oven conversion kit would provide the base and heat needed to put the homemade pizza of my dreams within reach, but some misgivings experienced by early adopters left me waiting for refinement. It took a few years, but a recent post on Serious Eats finally dubbed the KettlePizza as nearly close to perfect with some modifications. That was good enough for me to jump on the bandwagon and seek out a KettlePizza, which I got a few weeks ago as a gift, and finally took on a test run this weekend to some stellar results.
What is the KettlePizza and Why Do I Need It?
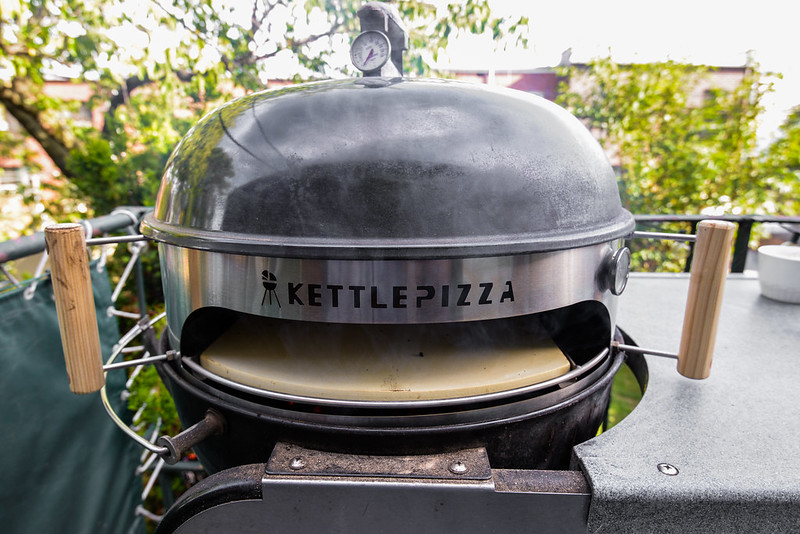
For the uninitiated, the KettlePizza at its core is merely a steel ring the diameter of a kettle grill (18 1/2", 22 1/2", or 26 3/4") with a slit cut out for the launching and removal of pizza without lifting the hood. So what makes such a simple device so revolutionary and worthy of lust?
Basically to cook a pizza with the most desirable traits, you need a lot of heat. The coal ovens used in most of the best New York pizza joints run up and beyond 900 degrees. Compare that to a home oven that may only go to 500 degrees, and you're falling way short of the heat required to beautifully puff and cook a crust at the same time the cheese melts and toppings cook.
Now if we take pizza out of the kitchen and to a charcoal fueled grill, your firepower increases about 200 degrees. Take that a step further and add some hardwood into the mix and you're up another 100-200 degrees, coming close to matching the heat of a quality wood-fired brick oven. So you can see the initial value in the KettlePizza.
The latest pro version of the KettlePizza doesn't just deliver the heat, but a design that's completely thought out for the task it sets out to preform. First it has a tombstone shape stone that gives you ample surface area to launch the pies into the oven. Second, it has opened sides around the stone to allow for additional fuel to be added without lifting the hood. Third, it has a basket in the back that elevates some fuel to pie level to deliver even more heat. Fourth, it has a built in thermometer to let you know when it's pizza cooking time. Finally, it allows for a second grate to be added at the top of the KettlePizza ring, which is an important point because it allows for the modification that will bring the KettlePizza to maximum effectiveness.
All this added up to a must-have accessory for me, and while some may scoff at the price (the pro kit will set you back $300), compare that to the time and cost of building a classic doomed wood burning oven, and the value is immediately apparent.
Firing up the KettlePizza
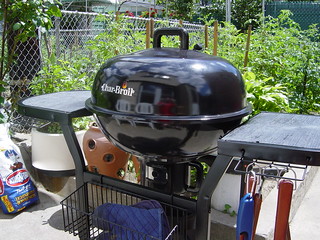
Since my dream of great home pizza was fulfilled by two generous friends, it seemed only right that they should be the first to enjoy the pies to come out of the KettlePizza. So I went ahead and arranged a pizza party with them, and about an hour before they arrived, I began firing up it up, following the procedure Kenji outlined on Serious Eats, which involved:
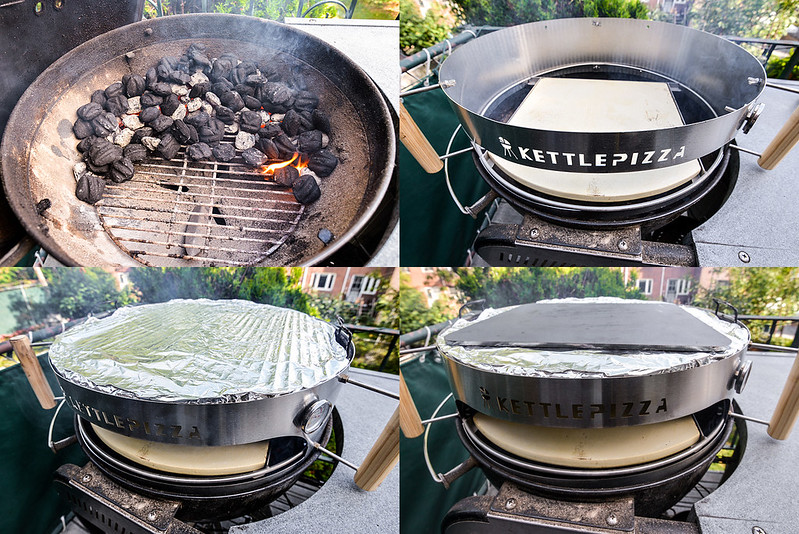
1. Lighting one chimney full of charcoal. When it was lit and covered in gray ash, I dumped it out on the charcoal grate and arranged the coals in a crescent shape along the back wall.
2. Adding about 1/2 a chimney more of unlit coals on top of the burning charcoal. These coals added more heat and lengthened the cooking time without refueling.
3. Set the KettlePizza ring and tombstone in place.
4. Nestled a grilling grate wrapped in foil into the top of the KettlePizza ring.
5. Place my Baking Steel on top of that second grate, then set the grill lid in place. (A new Baking Steel cut specifically for the KettlePizza is now available.)
6. Let the grill sit for about 30 minutes to throughly heat the grill, baking stone, and Baking Steel.
7. Add a log or two of hardwood to the back basked of the KettlePizza.
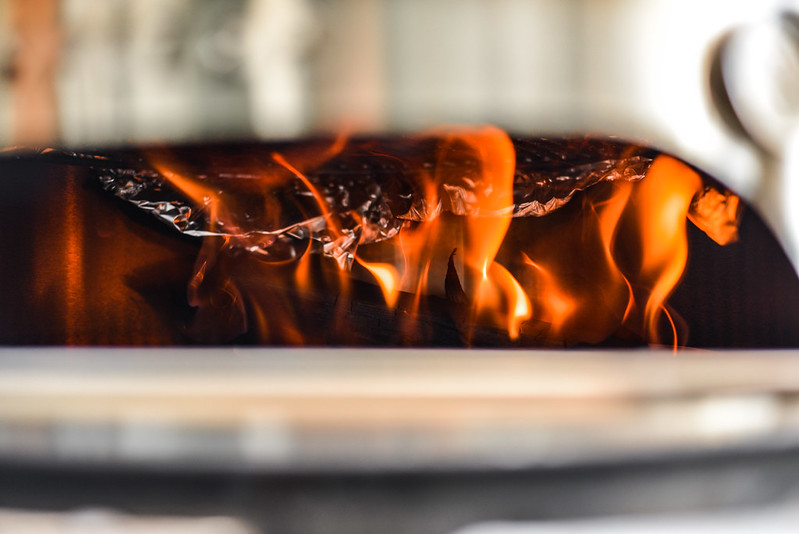
Once that log was ignited, the thermometer at the front of KettlePizza jumped from 700 degrees to off the scaled, probably around 850-900 degrees, and it was go time. You can see how the flames curled up an traveled along the foiled grill grate. Add that to the heat generated and retained by the Baking Steel, and the top of the oven delivered a heat a couple hundred degrees higher than the bottom. This heat variation between floor and ceiling is what's needed to set the bottom of the crust, the top, and toppings at the same time in beautiful harmony.
The Pies
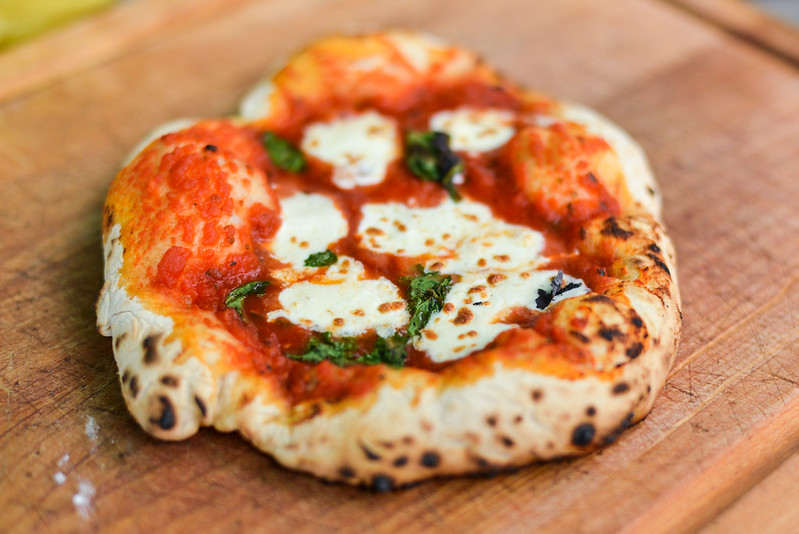
Then came the moment of truth, the first pie. We went classic with this one—just mozzarella, sauce, and basil—and despite some challenges getting it onto the peel, it was launched into the fiery oven with ease.
I watched carefully as the back crust puffed, and once it started developing some leopard spotting, I began spinning it for even cooking. A constant and eye fiddling with the pizza's position was needed, but it's not much of a time commitment since this pie was done in around 2 1/2 minutes. What came out was beautiful enough to make me cry.
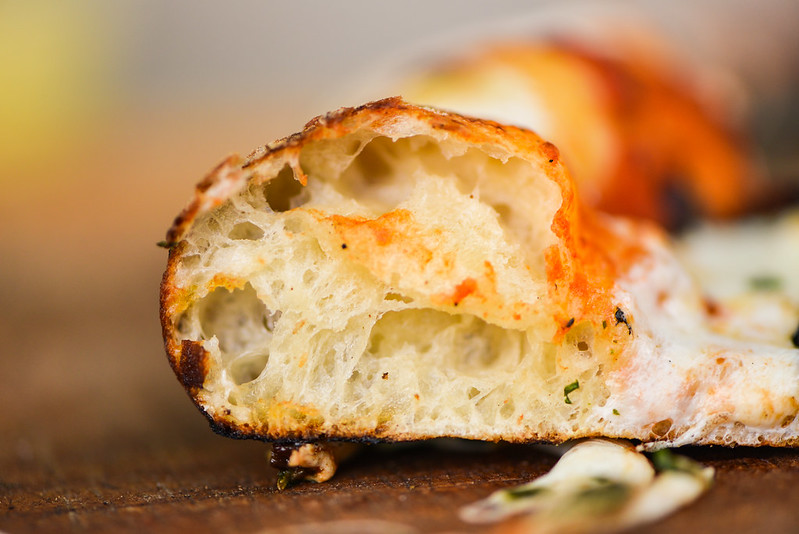
Never have I made a pizza that had a spotted, airy crust like this. The dough seemed cooked nearly perfectly, with a hole structure that was a sight for sore eyes. It had a slightly crisp exterior that gave was to a wonderful chewy and flavorful interior.
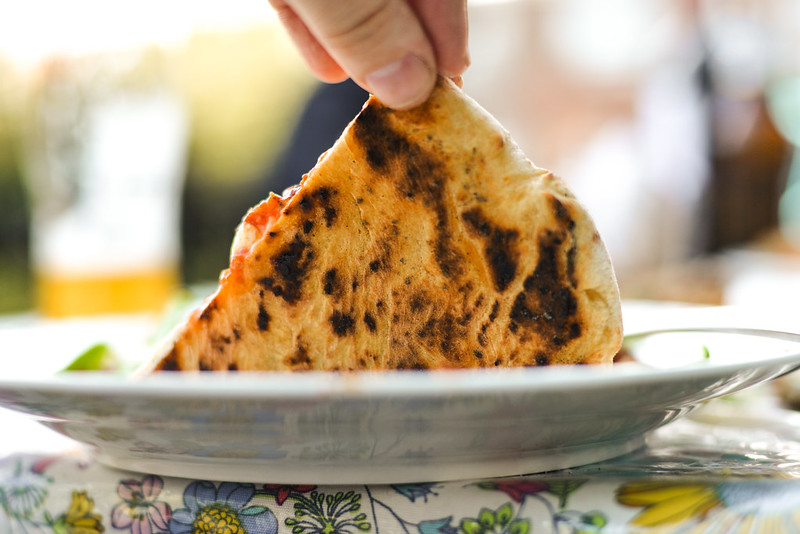
On the first few pies I burnt the underside that was closest to the fire when the dough was first placed in the oven, but by the end of the evening I had that figured out and each pie had a crispy underside with patchy char that added texture and flavor.
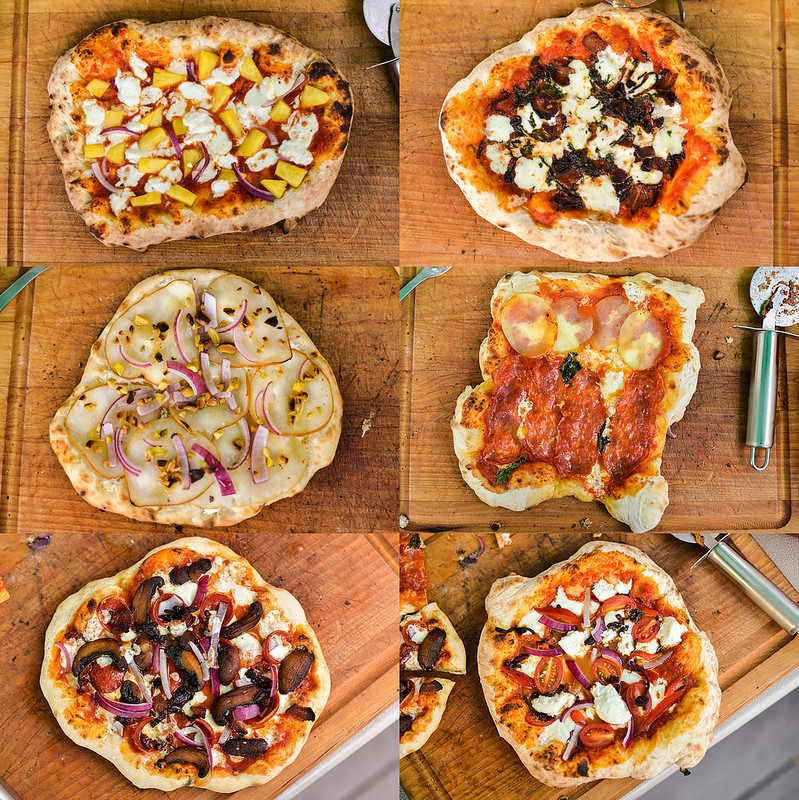
From there we became pizza making mad men and worked through every piece of dough, topping each with a different combo. These pies represent about 1 1/2 hours of cooking, in which time I never refueled the charcoal, but did have to add a new piece of hardwood about every 20 minutes or so to keep the oven at optimal temperature.
So here's the breakdown of each of the pies above (snaking down from left to right):
1. Pineapple, red onion, mozzarella, and ricotta
2. Bacon, fried shallots, fried herbs (thyme, rosemary, and basil), and mozzarella
3. Goat cheese, pear, pistachio, and red onion
4. Mozzarella with 2/3 hot sopressata and basil and 1/3 potato
5. Pepperoni, red onion, sauteed mushrooms, and mozzarella
6. Red onion, fried shallots, grape tomatoes, roasted red peppers, mozzarella, and ricotta (aka: the leftovers)
Special Shout-Out

I can't end without a special shout-out to the lovely ladies who made all of this (and future) pizza awesomeness possible. Debbie and Daphne have been close friends for a long time, and one of the first to employ my web design and development tools by having me make a website for their now defunct band. While they may not be making music anymore, I've supported their site through hosting and occasional maintenance pro-bono because they're such good friends, never wanting anything in return. So it was a surprise to get the KettlePizza in the mail as a thank you from them for this work, and makes me thankful I have such great and supportive friends such as them. You ladies rock!
You Might Also Like

Comments
-
Rose Those pizzas look awesome! Can you tell me how difficult it was to add fuel when the oven is that hot? Do you use a pair of tongs to drop the wood into the basket at the back? Or just slide it over the stone?
I definitely see one of these in my future. Thanks for the informative post. -
Mike I've wondered about those for awhile. I think you have me hooked! The pizzas looked awesome!
-
Josh @Rose Adding fuel in the way of hardwood logs was easy, just use the peel to slide the log across the stone into the back basket. You could also load up some charcoal on the peel to deliver fuel along the sides as well.
-
Chris I don't like pizza anyway except off of our Eggs anymore, so I know you loved this. I think this is a must have accessory for a Weber if you grill as much as we do.
-
Daniel B Wow! Looks great. The KettlePizza kit is now on my Amazon wish list.
-
Kurt I second Daniel's comment. That crust looks perfect!
-
Joel L Murphy So cool to see Pizza off the grill !! I use cedar boards, after soaking them, I rub Italian Mix on them and bake my pizza on it . The flavors rise up into the crust ! :)
-
Benito I just ordered one after eyeing them for awhile. Groupon has one on it's site now. Can't wait. Question, do you suppose any kind of stainless steel for the top will work or is this "baking steel" something special?
-
Josh @benito What makes the baking steel unique is it's thickness (it's damn heavy), plus it's pre-seasoned to be used for food, which isn't really necessary for this particular set-up. If you can get a piece of steel around the size and thickness of the baking steel, I'd assume the results would be the same.
-
steve The KettlePizza kit is awesome. Our family now switches between summer BBQs and wood-fired pizza parties-- Highly recommended. And after searching all over the web, I found the best deal on the kit: http://www.freshlineup.com/forhim/kettlepizza-basic-kit
-
Marilyn Just made my first pizzas last night and it was so easy! I did accidentally slide one into the coals in back and that lowered the temps for 15 minutes. Takes a little practice to slide off of the peeler. I'm going to make a cornmeal brush to sweep the burnt cornmeal off of the stone between pizzas. I used a bit more to get the pizza to slide a bit. Also I used Fleishmann's Pizza Crust yeast which is just 4 min. of kneading and then ready to go. Not bad at all. Will make a better dough next time. Thanks for recipe ideas.
-
Jon What is your dough recipe?
-
Josh @Jon Most of these pies used this dough recipe.
-
Tonya I have been wanting a Kettle Pizza cooker for a long time. My Walmart had them on clearence 40.00 couldn't believe my luck!!
We are having out first pizza cooking parry tonight. I did not have time to make dough, any suggestions on store bought?
Thanks for your help
Tonya
Garner, NC -
Tonya Moon What are your tips for overcoming a burnt underside?
-
Josh @Tonya Moon If your underside is cooking faster than the top, use a pizza peel to lift it off the stone once the bottom is done and raise the pie closer to the top of the oven/grill. This will stop the bottom from cooking and then speed up the cooking of the top.