German Bratwurst

In my earlier days of cooking, sausage seemed like a next logical step after a few years of throwing Meatwaves and developing recipes. At that time I opted to just buy the sausage stuffer attachment for my KitchenAid meat grinder, which was a bitch to use and, paired with less than stellar sausage results, made the effort feel arduous and pointless. Still, I'm not one to give up and I kept making sausages again and again, incrementally improving, but never quite reaching what I considered to be their full potential. The addition of a vertical sausage stuffer certainly made the process a lot easier and faster, and while I was getting better at seasoning and achieving ideally juicy links, the years of past memories always lingered. This made sausages something I still considered comparatively difficult and risky, leading to only taking a crack at them once a year or less. I think my perception of sausage making has finally turned a corner though with these German bratwurst, whose production felt totally manageable and with end results that I considered on par with top quality specimens.
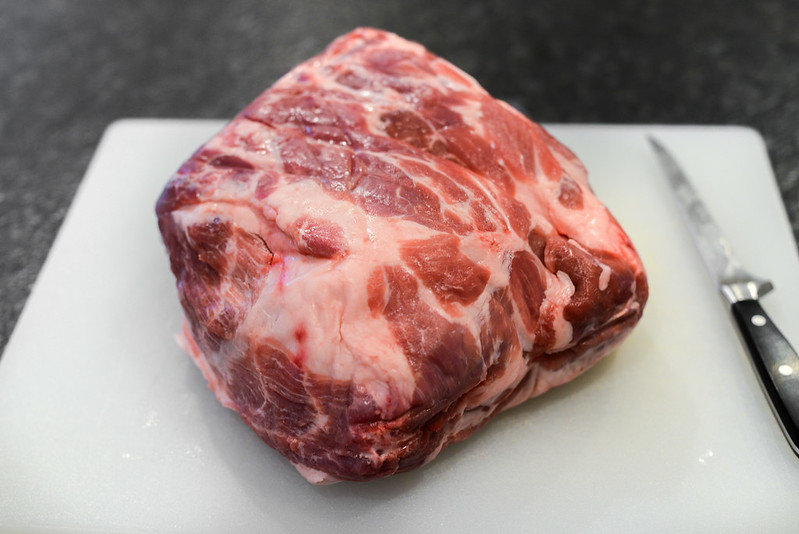
There was a lot of learning that got these brats to that point, and hopefully my years of struggle will translate to earlier success on your part. One thing I've always known was incredibly important is that sausage needs a lot of fat. Thirty percent is a minimum to output the juiciest links. To start to get to that ratio, pork shoulder is a good place to look. This extra fatty cut will deliver an initial fat to meat ratio that looks like it's on the right track.
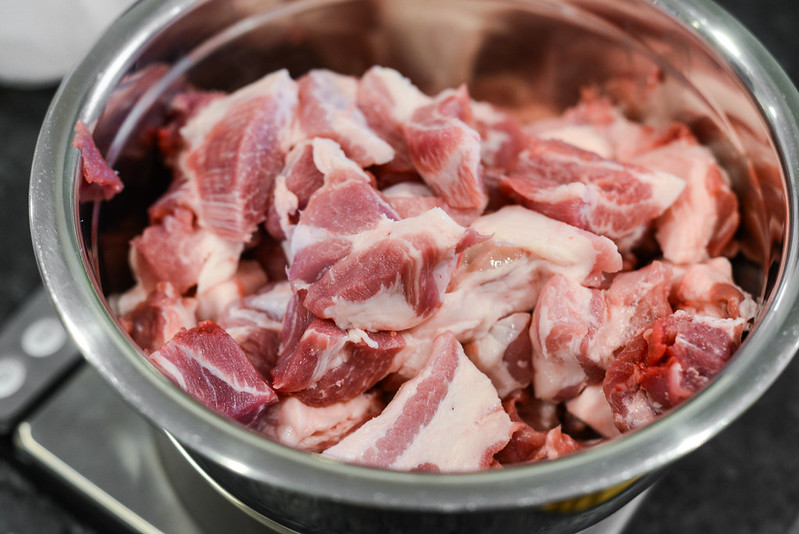
After cutting off the initial amount of required pork shoulder—three pounds here—I stuck the cubed meat in freezer while I continued prep. This gets to another important truth of sausage making that I didn't follow close enough in my earlier years—everything needs to be kept super cold. So storing everything in the freezer or fridge when not in use is pretty crucial, and once I became hawkish on this, my sausages started turning out better.
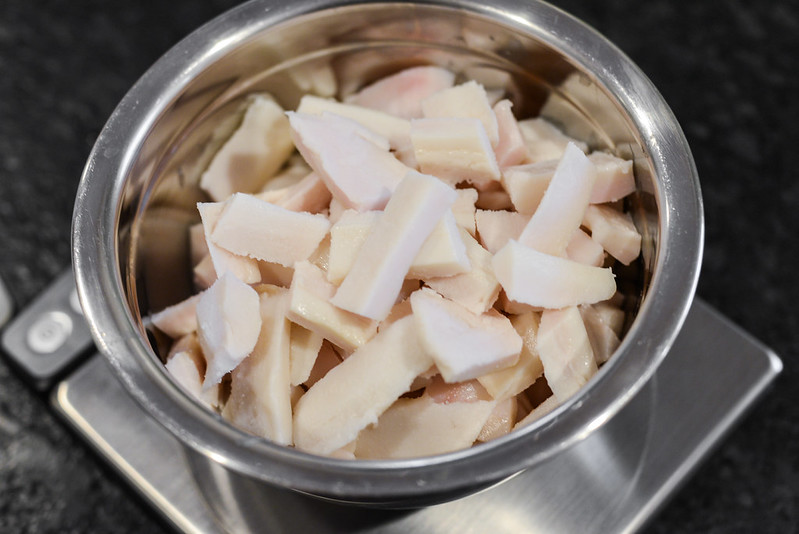
While the pork shoulder on the surface looked like it had enough fat, I know now that adding more fat only makes things better. This was done here by using pork fat back, which I removed the skin from, cubed, and then stuck in the freezer until it was time to grind.
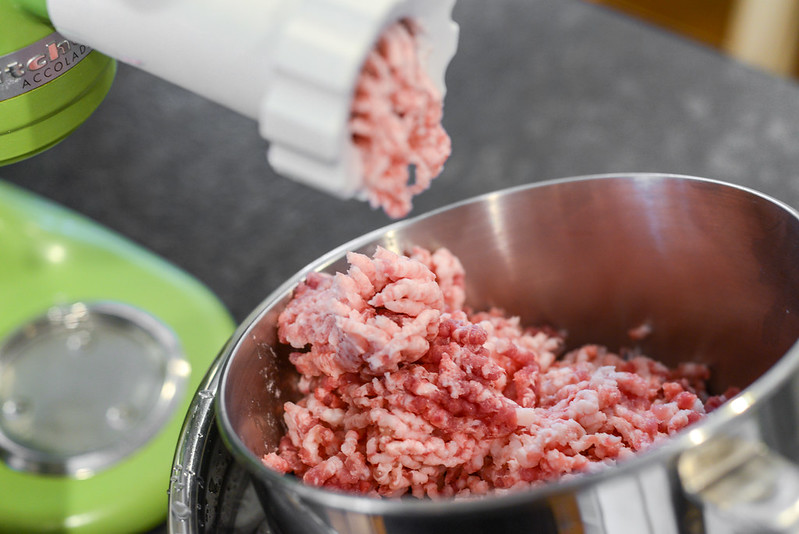
When that point came, I went to the freezer and grabbed my grinder—which sadly formed a crack during this session and now requires replacement—and set the ice cold device in place on my KitchenAid. I then processed the pork and fat through the small die into a bowl set in ice water to continue to keep everything as cold as possible. Bratwurst also calls for the use of veal, which I had to buy pre-ground because my local stores didn't have the veal shoulder I wanted to use.

Once ground, the meat went into the fridge while I cleaned up a bit and got the spice mixture ready. I wanted to go with a traditional German bratwurst flavor, which I got with a combo of salt, white pepper, ginger, mustard powder, and nutmeg.
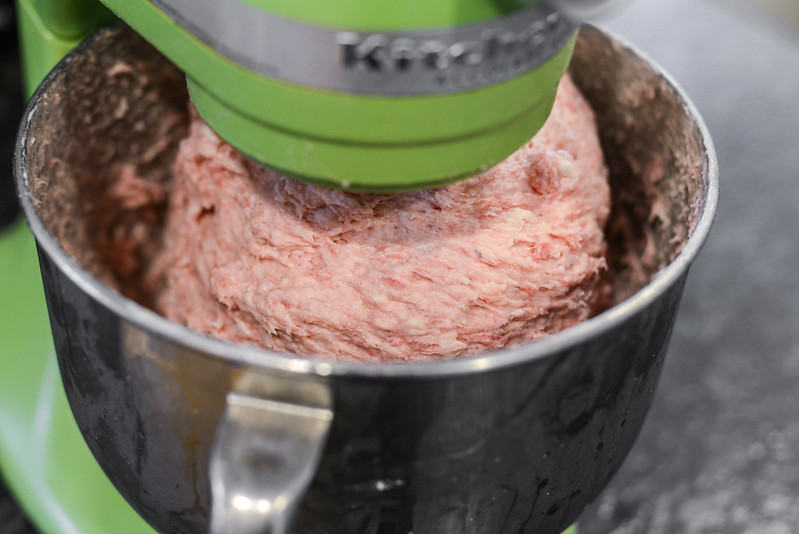
Next came creating the emulsified texture, one of the things I failed at for so many years. Really, the main trick to getting this right is ensuring everything has remained cold up to this point, which it had. Then it's just a matter of letting the KitchenAid do the work of first mixing in the spices, then the eggs and heavy cream, until everything is homogeneous. It only takes a couple minutes total and it's pretty easy to tell when it's right because the texture of the meat will be smooth and consistent.
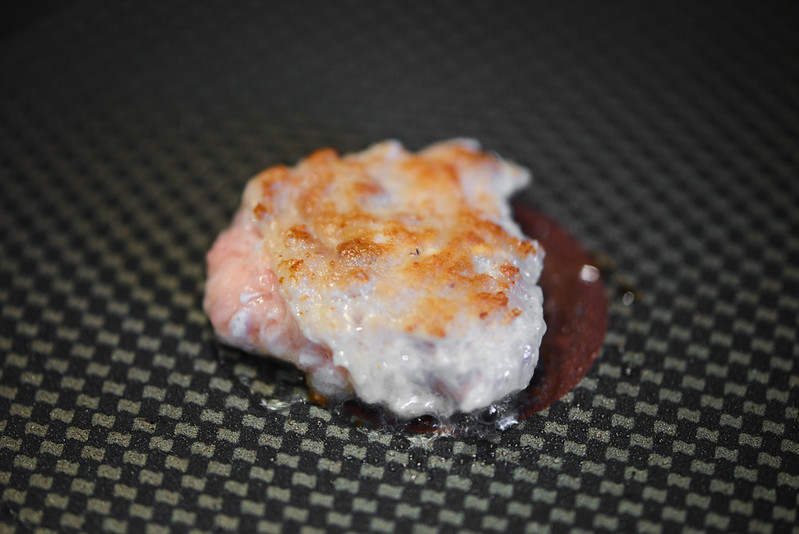
Then back into the fridge the finished sausage mixture went while I cooked up a test patty. This is a step you really don't want to skip because it's the only way you have to taste the sausage and adjust the seasoning before stuffing it into casings. My hope is this recipe will get you a well seasoned sausage, but spices and personal tastes differ, so I feel like this is a must, even when following a recipe.
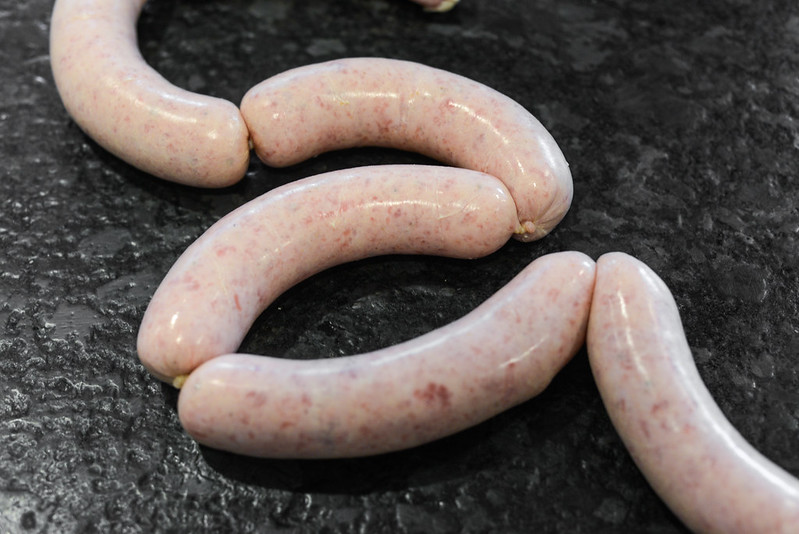
Next came time for stuffing, which I can't stress enough that a true sausage stuffer makes a world of difference here. I know it's an investment and space hog, but if you plan on making sausage with any regularity, I consider it a must have. So much is wrong with the KitchenAid stuffer attachment that it inhibits joy of making sausages—too slow, too high off the counter, and too uneven to complete this task effectively. With a vertical sausage stuffer, getting the meat into casings can literally take just seconds, and usually the meat is stuffed in consistently even and full.
Getting the sausages put together right is all for naught though if they're not cooked properly, and in here laid one of my biggest faults in the past. I used to just grill my links over a hot fire, which led to uneven cooking and lots of bursting, which allowed precious fat to escape. Nowadays I employ a braising method, which cooks the sausages more gently and evenly.
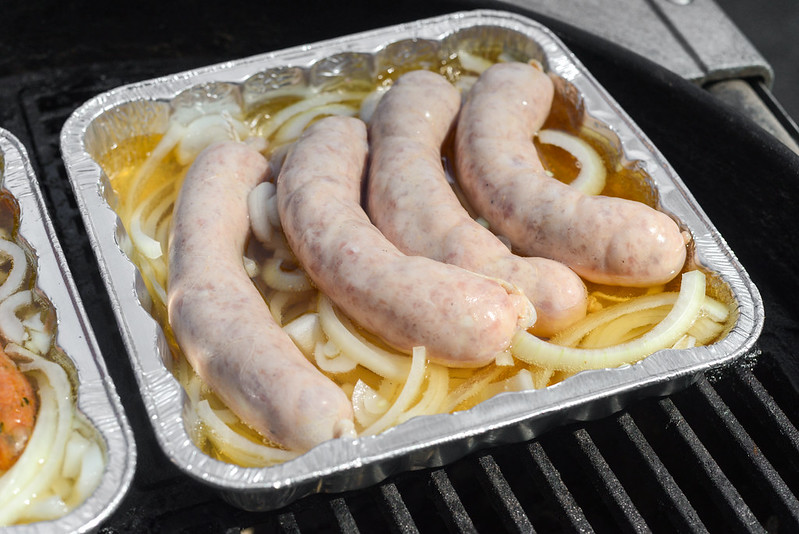
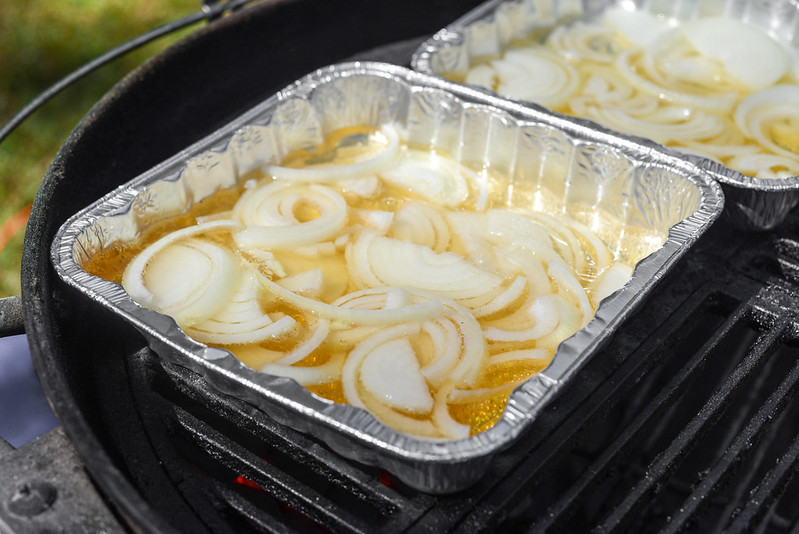
You can also introduce some additional flavor here from the braising liquid and other items thrown in. It made sense for bratwursts to be braised in beer, and I tossed in some sliced onions as well—although I would have opted for sauerkraut if I had some at the time. I let the sausages braise over indirect heat with the grill covered until they reached 145°F in the center.

At which time, they were almost done, and quick stint over direct heat finished them up and added some browning to the exterior. Even with links that were almost fully cooked, there was still some small bursting, which lead to occasional flare-ups, so it was important to keep a close eye on the cooking and move the sausages around as this happened. Since the sausages were just about cooked all the way at this point, these leaks of excess fat were not as critical of a loss as if they were to happen when the sausage was mostly raw and that fat is needed during cooking process.
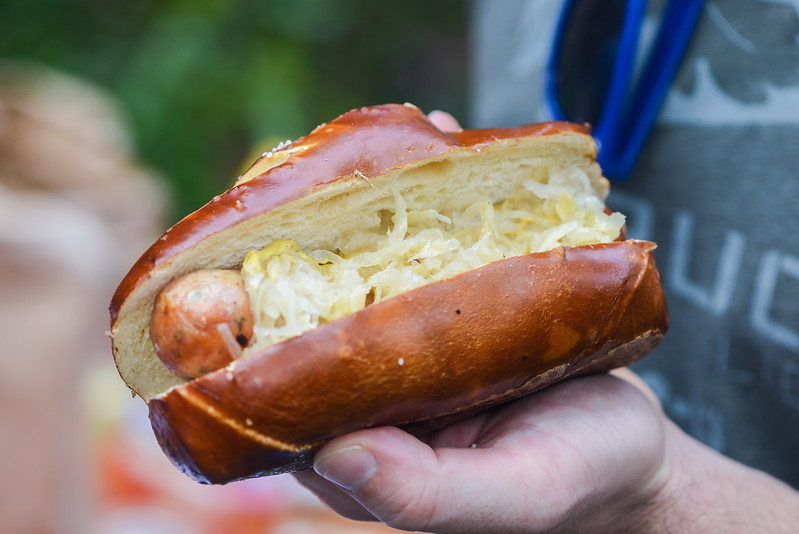
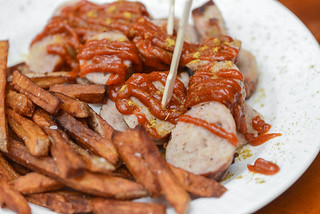
Now, after some meticulous care in production and cooking, it was the moment of truth. It just took one bite to know all that work had paid off. These brats were damn juicy and tasty, having a mildly spiced flavor that was slightly earthy, pungent, and sweet against the more dominant pork and veal. It was the smooth emulsified texture is what really got me giddy though because this is where I failed most often in the past. The brats were great on there own, even better in pretzel rolls with some sauerkraut and mustard, and better yet when sliced and served as currywurst.
Looking back at the end of day of bratwurst consumption, I didn't have the normal feeling of thinking this would be a one off I wouldn't repeat for awhile. Instead, with results this good, a lot of versatility of use, and a process that no longer felt as daunting as it one did, I could see myself easing into more regular sausage making and further exploring the endless possibilities available in this great meat medium.
You Might Also Like

Comments
-
David Beautiful Brats, Josh! Finding the right sausage stuffer makes all the difference in the world. I ended up using an LEM Jerky Cannon for small batches of sausage and love it.
-
bestsmokersinfo.com Beautiful Brats, Josh! Finding the right sausage stuffer makes all the difference in the world. I ended up using an LEM Jerky Cannon for small batches of sausage and love it.
-
BBQ On Main I recently braised some brats in german beer and sauerkraut and I'll never go back. It makes a world of difference! Do you have any tips for someone who wants to try making sausage without all of the kitchen gear?
-
bob meeeeee hunnnnnngrrreeeeeee
-
John meeeeeeee tooooooooo
-
Frank meeeeeeeeeee threeeeeeeeee
-
Melissa This was my first shot at bratwurst, well, stuffing ANY kind of sausage for that matter. Let me just say, I am sooooooo glad I tried this recipe FIRST, no need to look any further! We did the taste test (just frying a bit to check seasoning) and my husband and I were blown away! It's the perfect flavor! We are having friends over tomorrow and will do the beer and onion grill method, can't wait for that burst of flavor! Kudos to you on this, will def follow you. THANK YOU
-
Bart On a scale from 1 to 10, what would you rank them?
-
Kevin Can I freeze them
-
Josh @Kevin Yup, I still have some in my freezer now.
-
David Lewis Love this recipe. I am an avid sausage maker and this was my second use of this brat recipe. If any one is getting into making sausage or brats, I would advise that they buy a meat grinder and sausage stuffer. KitchenAid is to slow when stuffing and grinding meat.
Thanks again
David Lewis
ATLANTA, GA -
Lucas Atwell Is there a good alternative to beer for the braising?
-
Josh @Lucas Braise in whatever flavors you like best. If I weren't choosing beer, I'd personally probably go with a stock.
-
Jason These look like they are definitely worth trying!
-
Mike What Sausage Stuffer do you recommend? I agree the Kitchen Aid is cumbersome. There seems to be a lot on the market with a price range of $100 - $300+
-
Josh @Josh I use a Lem 5lb Vertical Stuffer and have been very happy with it. This looks like the latest model, which seems like it has some improvements over what I own.
-
Adam Do you freeze sausages raw or cooked?
-
Josh @Adam I've done both with success. If you know you're going to be freezing cooked sausage, it's best to put them in an ice bath right when they're done cooking.
-
Kurt I'm tellin' ya, German or Wisconsin style Brats, Italian Sausage, American Breakfast Sausage, Mexican style Chorizo . None of them are hard to make and the flavor.....an amazing difference from store bought!