Yaki Onigiri

Crispy rice is my jam. I remember a fateful day many, many years ago that I got a bibimbap in a heated clay bowl that had an excellent layer of crispy rice lining the edges and I fell in love. Now I make crispy rice things on the regular, with Laotian nam khao being the favorite in my currently rotation, but I still rarely use the grill for crispy rice endeavors. Actually, for all the crispy rice I eat, I only have two recipes on this site that deliver that both crunchy and tender experience—one for Thai skewered sticky rice, and another using sticky rice as "burger buns." Well, now I'm adding a third, for Japanese yaki onigiri, and, while it's even more simple than those previous recipes, it's no less delicious or impressive.

In the past, the fact that sticky rice sticks together so well, as it names implies, made it my go to go grilling, but yaki onigiri utilizes Japanese short-grain rice, which you'll commonly find labeled as sushi rice. While this rice isn't as naturally sticky as what I've worked with in the past, as long as it's cooked right and then formed well, getting it to hold together while grilling should not pose much of a problem.
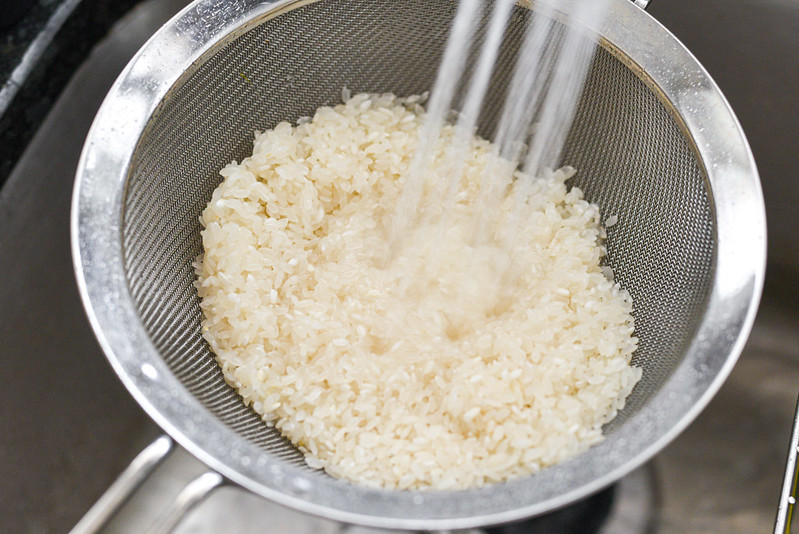
It's important to give the rice a rinse before cooking to remove starch that can make the rice too gummy in the end. Not long ago my wife criticized my rice often and I realized the folly was not washing it quite enough. So to make sure I don't run that risk, I've taken to really showering it in water in a fine mesh strainer instead of what I used to do, which was to cover the rice in water and them dump the water out a few times in the rice cooker bowl.
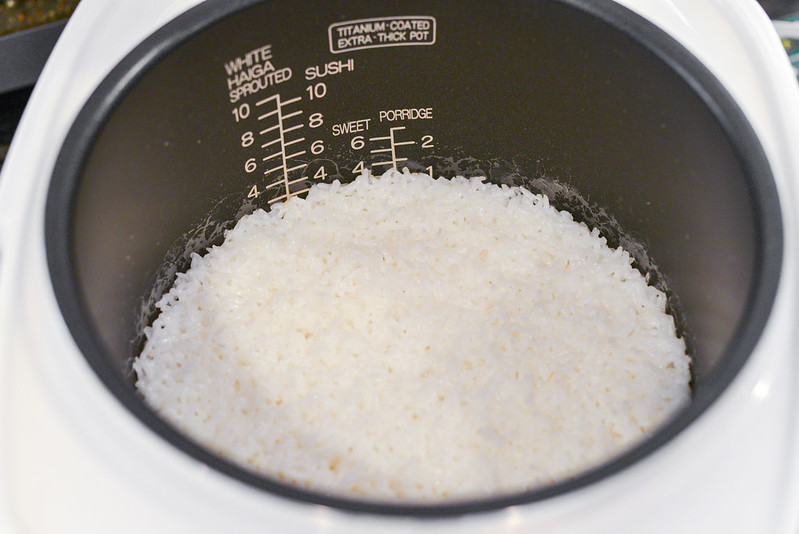
I used my rice cooker here to take the set-it-an-forget-approach to cooking the rice, but I included directions for cooking it on a stovetop for those without a rice cooker. Once the rice was done, it needed to be molded by hand, so I popped the lid open and let it rest for a bit until I could comfortably handle it.
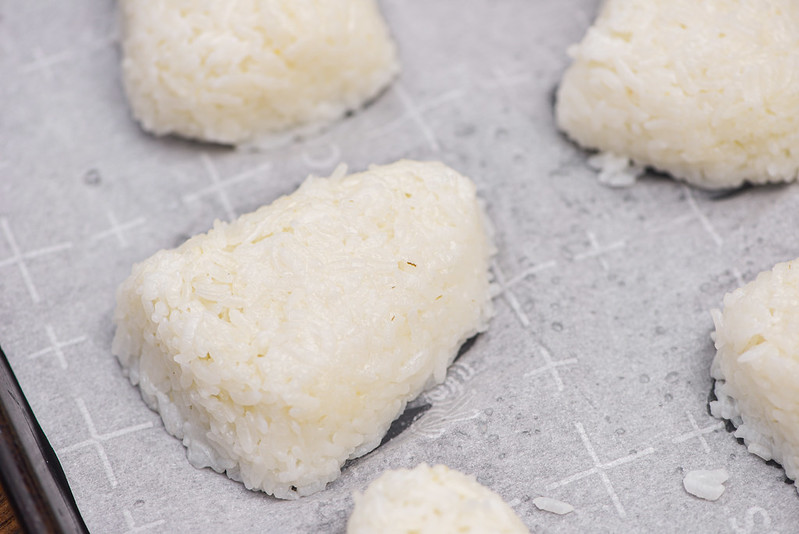
After wetting my hands to prevent the rice from sticking to them, I broke off about half a cup of rice and formed it into the traditional triangular shape. This was tricky for the first couple of rice balls, but it didn't take long to get the hang of it. I also found it easy to fix any mishaps in the shape after putting the rice balls on a parchment-lined baking sheet too.

After I had the entire batch of rice formed into little triangles, I took them outside to the grill and started cooking them on a two-zone fire, setting them close too, but not directly over the fire. I was concerned the highish heat (the fire was running at about 400°F) would too quickly brown and potentially burn the rice.

That didn't end up being the case though, the rice was actually cooking too slowly and not browning at all, so I moved the triangles to be positioned directly over the flames and they then started to lightly brown and crisp nicely without burning.
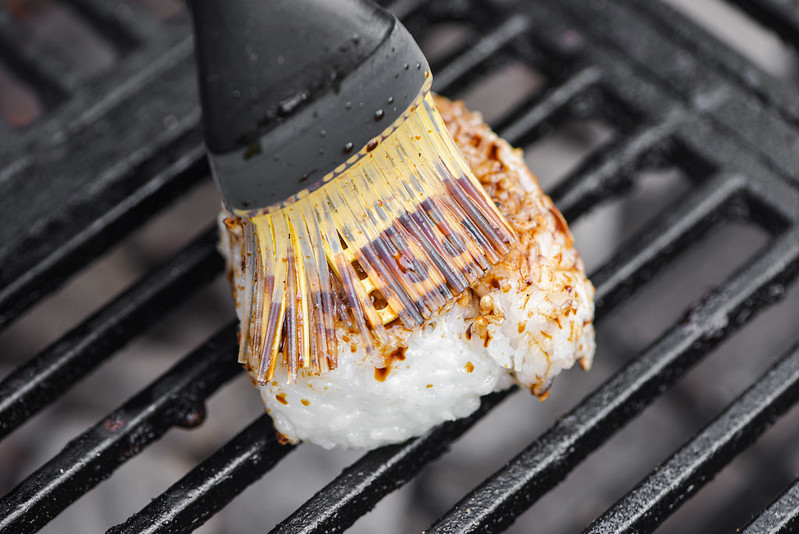
Either giving the grilled rice a brushing with soy sauce or a miso glaze are the two most traditional ways to finish yaki onirigi. The miso-based sauce sounded like the better of the two for me, but the day I made these I had two other miso-based recipes going on, so I opted for the simple soy sauce incarnation for something different, which had me merely brushing on straight soy sauce once the rice was nicely crisped on both sides.
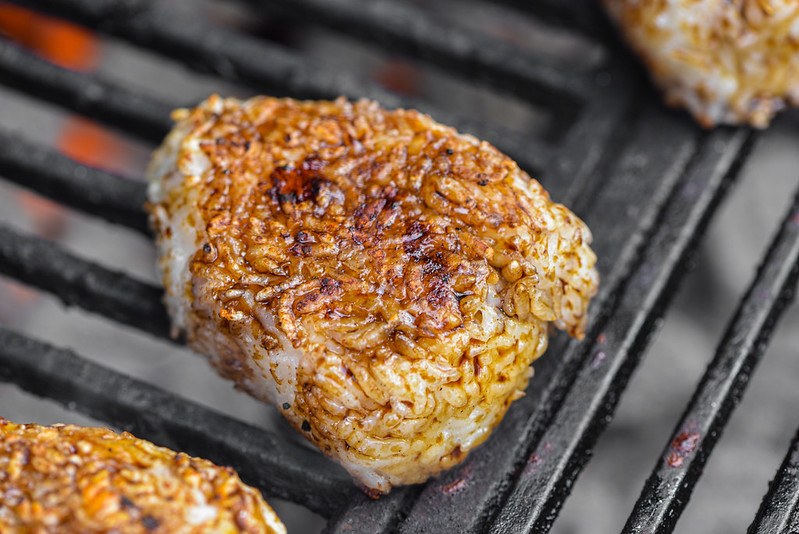
I then let the rice cook about another 30 seconds per side just so the sauce baked in well, and once done, they looked quite attractive, in my opinion.

That first bite brought all the joys of crispy rice with an exterior that crackled as my teeth broke the surface, and then that gave way to a tender, warm, and chewy interior that delivered a lot of textural greatness with a single ingredient. The soy sauce brought most of the flavor, adding a deeply salty and savory competent that I went back and forth a bit between loving and thinking it might be a tad too sharp. I do think I would be more into the miso-version, but that just means I get make these again and share another crispy rice recipe, and those are both pluses in my book. The fun doesn't stop there though, yaki onigiri can be stuffed, seasoned, and dressed in many different manners, so now that I have the basics documented, this dish is something I can have a lot of fun experimenting with in the future!
You Might Also Like


Comments
-
michelle What kind of rice cooker is this? I'm looking for a good one!
-
Josh @Michelle I recently bought a Zojirushi and highly recommend it. I have model NS-LGC05, which is a 3-cup capacity, but they make it in 5.5 and 10 cup capacities too.
-
Michelle Thank you! can't wait to try!