How to Grill Juicy Boneless, Skinless Chicken Breasts

If you peruse the many, many chicken recipes on this site, you'll find me bashing skinless, boneless chicken breasts for grilling over and over again. That's because these relatively flavorless pieces of meat are, while incredibly ubiquitous, one of the more difficult standard meats to get right. That's due to a combo of a hot fire and their lack of fat which can quickly render them dry and unpleasant, so rather than risk releasing a recipe that can easily not output the intended results, I more often than not opt for the much more forgiving and flavorful chicken thighs. All is not bad in boneless, skinless chicken breast land though, and if you're armed with the knowledge of why they're notoriously difficult to get right and how to deal with those pitfalls correctly, you'll be on the road to the juiciest grilled chicken breasts possible.
Getting Even
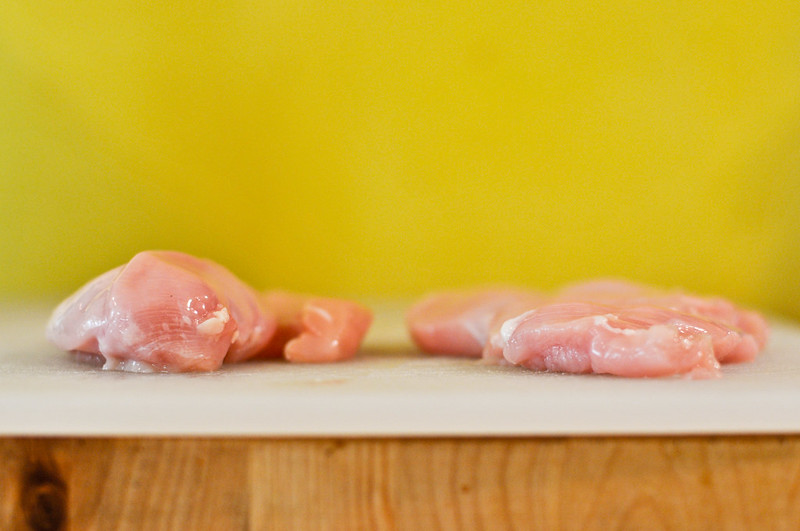
The chicken breast is a very unforgiving meat, anything over its ideal temperature will almost immediately equate to drying out. The physical shape of the breast isn't kind in this respect, as its uneven height means the bulky center cannot be cooked through without overcooking the thinner portions of the meat. Easy solution to this problem though, just even out the height.

This involves giving the chicken a beating, which is also great for relieving any pent up aggression. I like to put the chicken in a resealable plastic bag for the pounding—the thick plastic doesn't break when whacked, and the sealed bag ensures chicken juice doesn't splatter all over the kitchen. Once safely in a bag, I go at it with my rolling pin, bashing the thicker parts of the breast until they match the height of the thinnest part. I don't like to go too thin here, keeping a height of around 3/4-inch, since a breast pounded out too much will also be more subject to drying out over high heat.
A Fine Brine

Brining is the next important step taken to avoid horrid dry chicken. Brining is the process of using salt to reshape the proteins in the meat in such a way that they retain moisture better when cooking. That retaining moisture part is key, as it provides some assurance that the meat will remain juicy even if a tad overdone, and be even better if cooked correctly. You really want this added protection when cooking chicken breasts and there's really no reason to skip brining because it's quick to do and the 20-30 minutes or so the fire takes to light and be ready for cooking is enough time for the brine.
Your main question in brining is wet or dry. A wet brine mixes salt and water together that the chicken soaks in, while a dry brine is merely sprinkling salt all over the meat and waiting. Both will have the same desired outcome of juicier meat, but with a couple key difference—a wet brined chicken will be plumper and juicier, but with a bit of diminishment in flavor and browning ability compared to using a dry brine.
Grill 'Em All

Before hitting the grill, the chicken will like you much better if you start with a clean and oiled grate. The skinless breasts have no fat to protect them from the heat, which equates to them easily sticking to a grate, a problem a clean and oiled grill grate alleviates.
With an even thickness, brine, and clean grill, the chicken is just ready to face its foe—a hot fire. You don't want to go too hot here, since the 500 °F of a new fire can too quickly dry out the breasts. On the opposite end, you don't want to go too low either because then there will no browning and you'll end up with pale, unappetizing chicken. A medium-high fire, 375-450°F, is just about perfect, creating a golden crust without overdoing the meat.
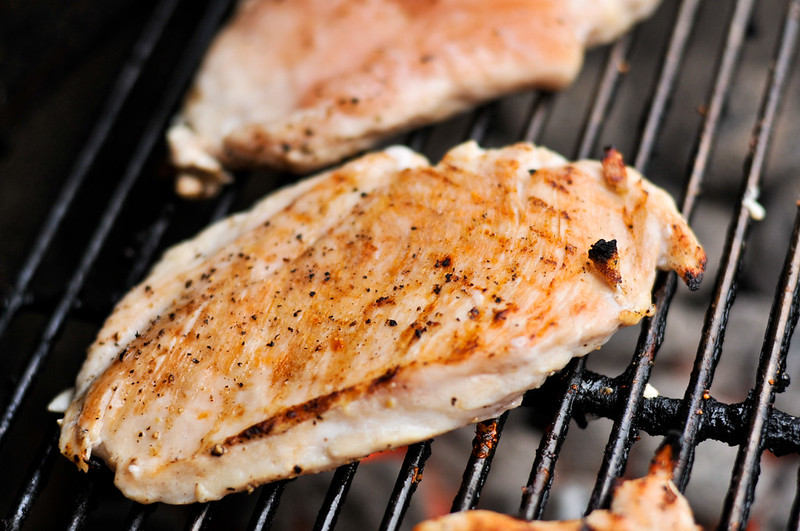
In my experience, it only takes chicken breasts a few minutes per side over direct medium-high heat to both brown and be cooked through at the same time. That being said, it's a good idea to always have a two-zone fire—with all the coals piled on one side of the charcoal grate—in case the chicken browns before it's done cooking through. In this case, you can finish the chicken up on the cool side of the grill, covered, and avoid burning the the breasts.
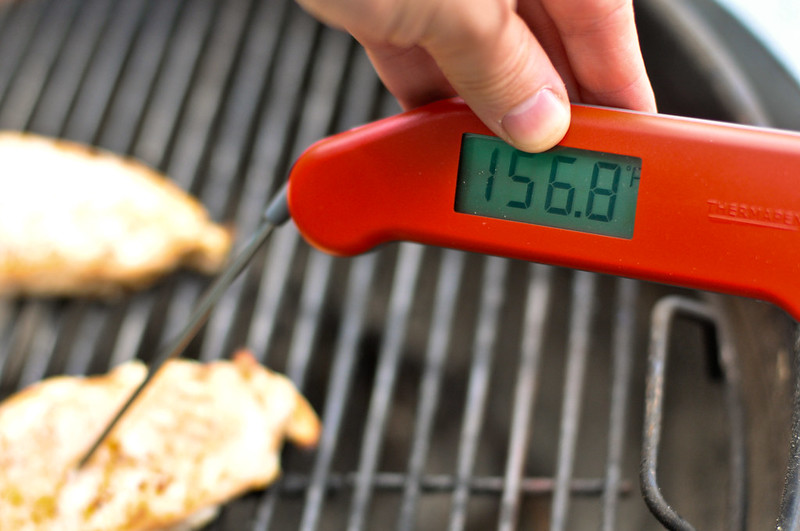
You know the chicken is done when it hits 160°F when an instant read thermometer is inserted in the middle of the breast. Upon a mandatory rest off the grill, the meat temperature will continue to rise to the 165°F approved by the FDA. This is all good and well if you like to play by the rules, but I personally pull the chicken even sooner, at around 150°F, which results in a juicier and more flavorful breast. With undercooking, the rest portion becomes more important because more time is needed to kill off any potential nasty bacteria—165°F is the FDA recommended temperature because bacteria pretty much die instantly at this heat, while at 150°F it takes about three minutes for that to happen, but given the time, the chicken should be just as safe to eat.
Dressing Up
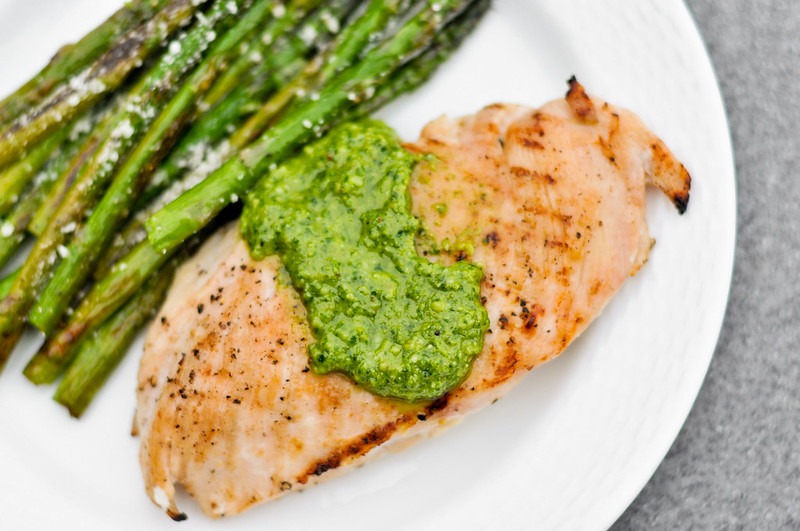
So now we have beautifully moist and evenly cooked chicken breasts, no small achievement. But for all of this work, in my opinion, chicken is still rather dull on its own, so it's time to make the cook really count.
For these particular breasts, I smothered them in an arugula pesto, which added a nutty, peppery kick that elevated the chicken in a dramatic way. Some other flavorful toppers to consider: peach-bourbon barbecue sauce, cilantro pesto, or chimichurri.
You can also add introduce flavor with more complex brines, like an apple brine or a nice spice rub like on these blackened chicken breasts.
No matter how you gussy up your chicken, all of it will do little to help a poorly grilled breasts, which should be something you no longer have to tolerate, ever.