Nam Prik Noom

My love of Thai food was a driving force in choosing Thailand as a vacation destination a couple years back. I was way more in tune to what I hoped to eat there over sites I wanted to see, and with only a short timeframe in the country, time in the North was a requirement for getting those important eats in. Chiang Mai became our home base city for most of the trip and it quickly became my second favorite city I've ever been do (Barcelona will likely always be my number one) and I wasted no time eating as soon as I got there. After tossing my bags in the hotel room, I ventured out and went straight to the market, where I picked up a plastic bag of nam prik noom—a Thai roasted chili dip—along with a bundle of pork rinds for dipping, which became my primary snack during my stay. That savory and spicy dip was just one of the many things that left a lasting impression on me, and also something I don't see stateside very often, so it made sense for it to become something I needed to learn to cook at home.
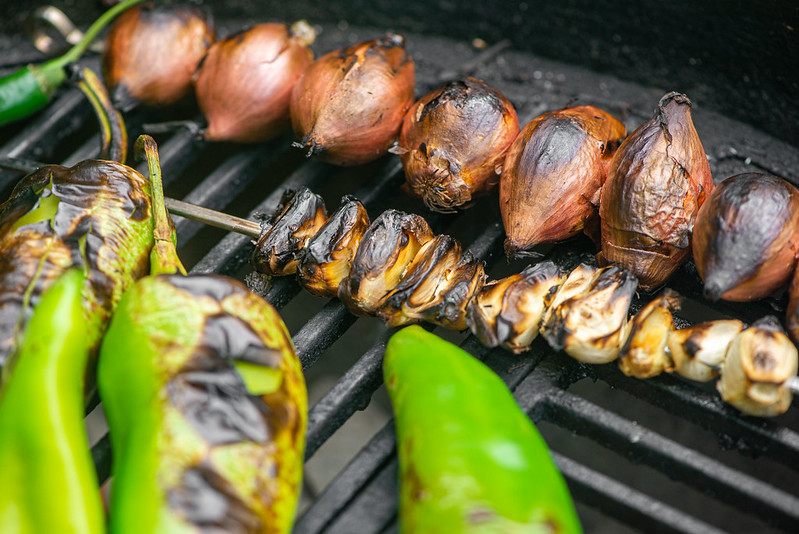
The majority of the ingredients for this dip need to be roasted, and the grill will provide maximum flavor in this department. Shallots and garlic are among those items, which don't seem like they lend themselves to grilling very well. The skewer is your best friend here, and both the garlic cloves and small shallots can be threaded onto sticks for easy cooking over an open fire. You want both to be charred and nicely softened, and since that may happen at different times for each ingredient, it's best to put both on their own separate skewers.
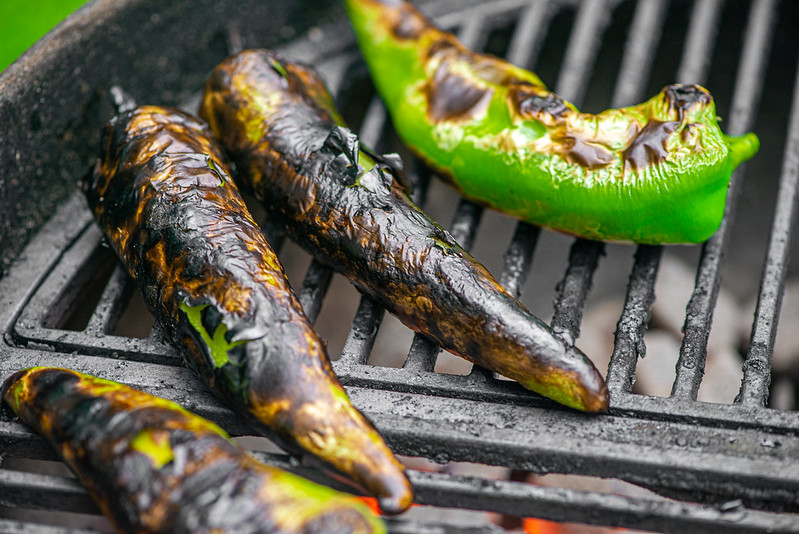
The chiles also need to be blackened over the fire. I'm not entirely sure what chiles are used in Thailand, but the trusted recipe sources I confided in from J. Kenji Lopez-Alt and Andy Ricker, both said most long hot green chiles will do, of which, Anaheims are what I chose to use. Those chiles were likely not going to get me fully to heat I wanted, so I also tossed some fiery birds eye chiles into the mix, which I later added in one at a time until I reached my desired heat level.

I've been on a mini-mission to learn how to cook Thai food better in general, and a big part of that is becoming familiar with the ingredients. It seemed like for nam prik noom, either fish sauce or shrimp paste could be used to add the salty savoriness that's called for, and since I've never tried shrimp paste, I gave it a whirl.

You should know that I'm not into shrimp, and when I opened this bottle of shrimp paste, the concentrated fermented smell of shrimp was a bit overwhelming for me. I also needed to toast the shrimp paste quickly before using it, which I did in the toaster oven, and that just intensified the odor and also got it embedded in the toaster, activating it again each time we made toast for a few days afterward. So I wasn't sure I was sold on shrimp paste as being the ingredient for me—I have no problems with fish sauce—but I had bought the stuff, so ventured forth with it.
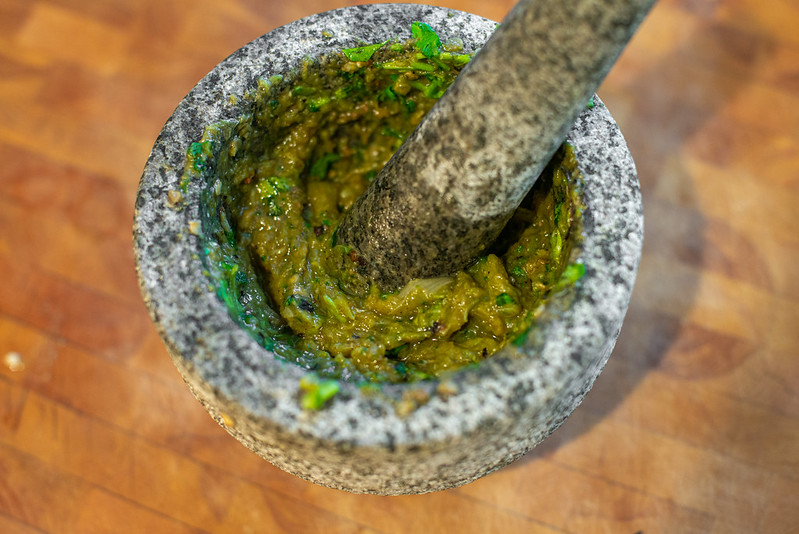
Prior to taking up Thai cooking, I barely used a mortar and pestle, so when I needed to invest in one, I got a relatively small version. That has caused complications with larger scale recipes like this one where I now have to work in batches, lengthening the time and energy required. I still wouldn't go any other route though, such as using a food processor, because there really is no substitute to a mortar and pestle to get the right texture and flavor in a recipe such as this.
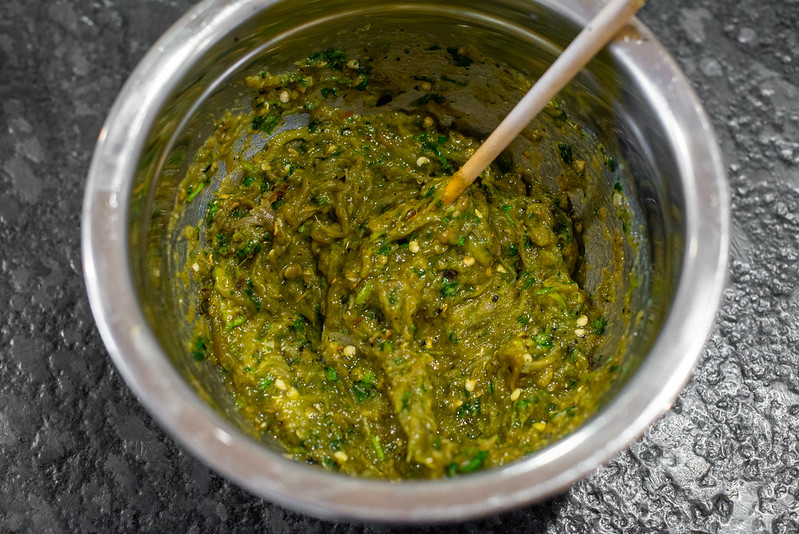
As I finished each batch of pounding the peppers, shallots, garlic, and cilantro into a rough paste, I transferred them to a larger bowl. I tasted it at this point and it was spicy, but also somewhat flat tasting. So I started cautiously adding in the shrimp paste a little at a time, and while the shrimp paste was originally off putting to me, it transformed the dip to something incredibly complex and full flavored—exactly how I remembered it from Thailand. For my taste, I ended up using less shrimp paste than was called for in other recipes I saw, so if you're a lover of its flavor, you may be well served adding a bit more than what I found was right.

All I wanted to eat this dip with were pork rinds, just how I did it in Chiang Mai, but I also served it with other traditional offerings like blanched green beans and cucumber slices. I personally think the airy crunch of a pork rind is the perfect compliment to the thick and scoop-able consistancy of the dip that also has a amazing depth of flavor which is a melding of the fruity and spicy chilies with their mellow smokiness from the grill, light garlic, a little shallot sweetness, shrimp paste funkiness, and cilantro and lime juice freshness. It's a distinctly Thai flavor combo and a prime example why this cuisine will forever have my heart.
You Might Also Like


Comments
-
Kevin Wright That's awful advice. Cook garlic and shallots in their skins and they are basically mush inside. Cook them peeled for less time and they are great.
Revise your recipe. It's awful now. -
Sarah Nichols It's not awful advice. I do it all the time with lots of different cuisines; just have to be careful not to burn them too much. When you peel off the skins, they are perfect.
Best tip is to put the charred items into a covered bowl to cool and the steam will help loosen the skins and make them easier to peel.
Thanks Joshua, this is a really good recipe -
Maryann Clearly Kevin doesn’t know what he’s talking about at all
-
Dave We've out shrimp paste in for years,love it.
Also roast a full aubergine de skin and smash that in. Lovely