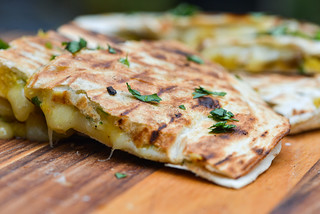
Tamales with Rajas and Oaxacan Cheese

Towards the end of my stint writing for Serious Eats, I was branching out from grilling and barbecue, and one assignment I picked up was to try out recipes for tamales. At the time I had a source for freshly made masa and my testing led me to the conclusion that the best of the best tamales came only when I used that fresh masa. I did that recipe not long before I moved to North Carolina, where I haven't found a place for fresh masa quite like the now shuttered Tortillería Nixtamal here, so I just haven't made tamales since. The tamales I made that started with the readily available dried masa were still pretty damn good though, and I decided that eight years was a long enough grieving period for my desired fresh masa and got back to tamale production this past fall, starting with my personal favorite of tamales with rajas and Oaxacan cheese.
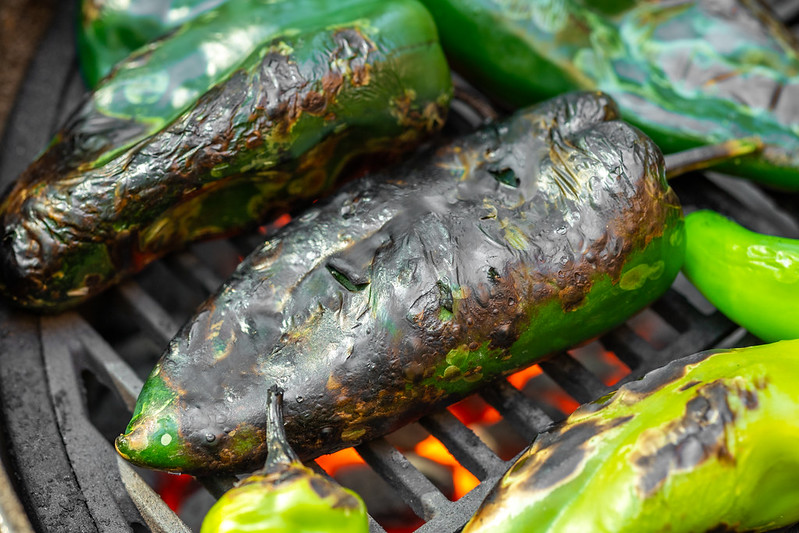
Besides just really liking these tamales, one benefit of them is that I can incorporate the grill, which is bonus for both flavor and generating recipes that belong on this site. I used a blazing hot, direct fire to pretty quickly char up a ton of poblano and Anaheim peppers. In recent years I've really been leaning into Anaheims because I like their heat level and fruity flavor, but alone they had the potential to be too spicy, which is why I kept in the standard poblanos in the mix. Of course, you don't have to use the grill here, the peppers can also be charred over an open flame on a gas burner, or under the broiler in the oven.
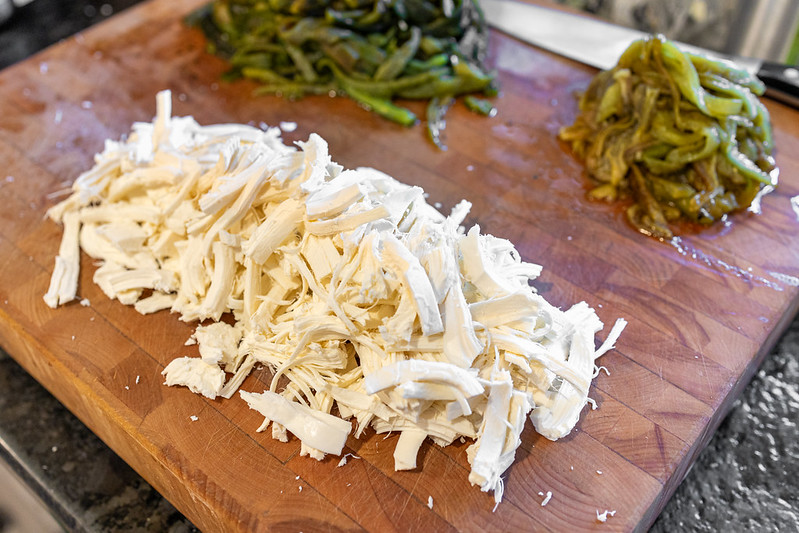
Once the peppers were completely charred, they rested in a covered bowl until cool enough to handle. I then removed the blackened skins, stemmed, seeded, and cut them all into thin strips. Next, I unraveled a ball of Oaxacan cheese and tore that into similar sized strips by hand.
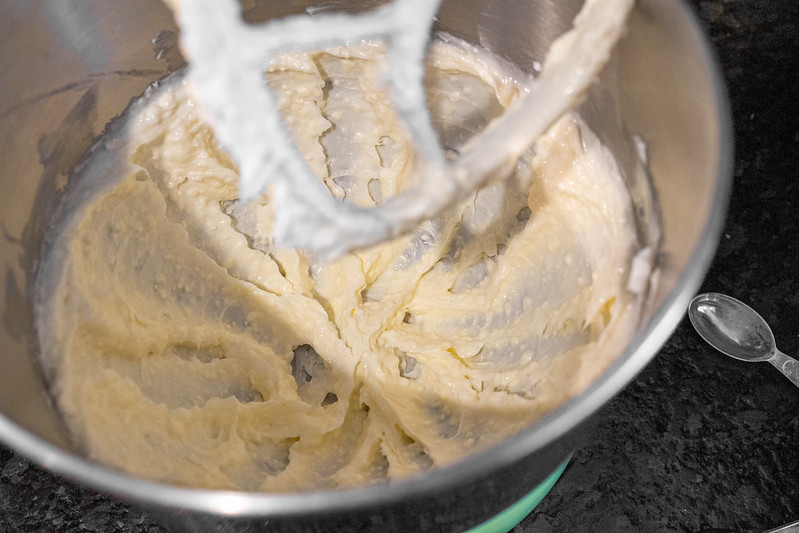
I made a few adjustments to my masa recipe from that first one I posted years ago, but kept the process more or less the same. This started with mixing the Maseca with vegetable stock—I would normally use chicken stock here, but I was purposefully making these vegetarian-friendly. Next, I whipped a combo of butter and vegetable shortening together until it was light and creamy, again swapping the usual lard for vegetarian-friendly alternatives.
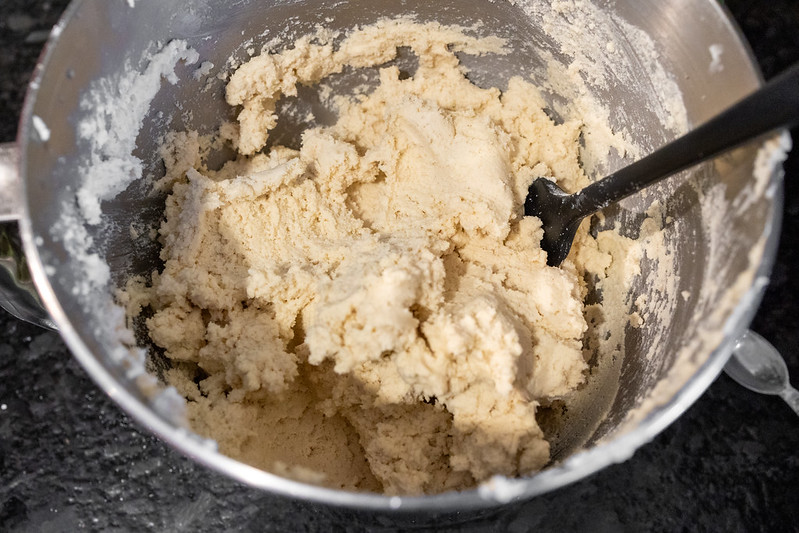
The masa was then beat into the fat in three equal-ish portions. Where I made the biggest change from my original recipe was next. Previously I added more stock to the point where the masa mixture had a hummus-like thickness and texture. This made great tamales, but it was harder to work with than the more common thickness that's more akin to Play-doh, which can be easily scooped out and molded by hand. So I added just enough stock to achieve that texture, which didn't require that much more liquid, only about half a cup additional in the end.
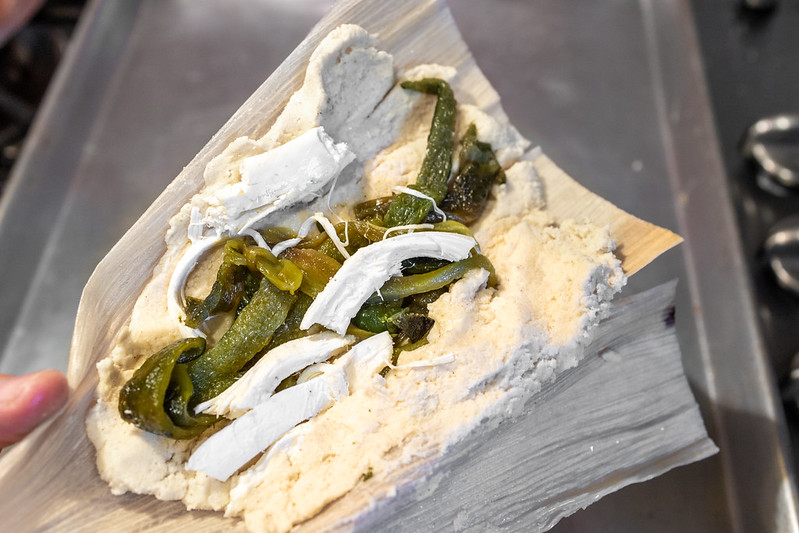
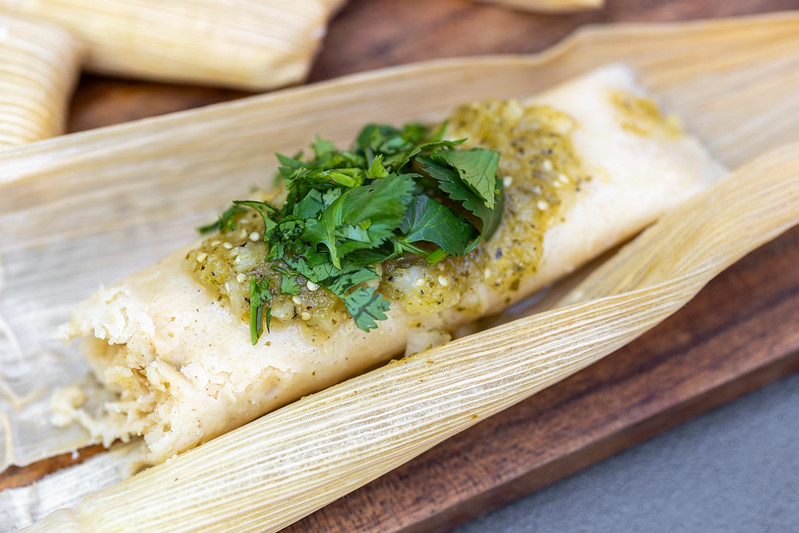
To assemble the tamales, I took a corn husk that had been soaking in water for about an hour and tried to determine which was the glossy side—with some husks it was very apparent, with others it was hard to tell and I took a good guess. I then spread about a quarter of a cup of masa into a rectangle on the wider end of the husk and placed pepper and cheese strips down the middle.
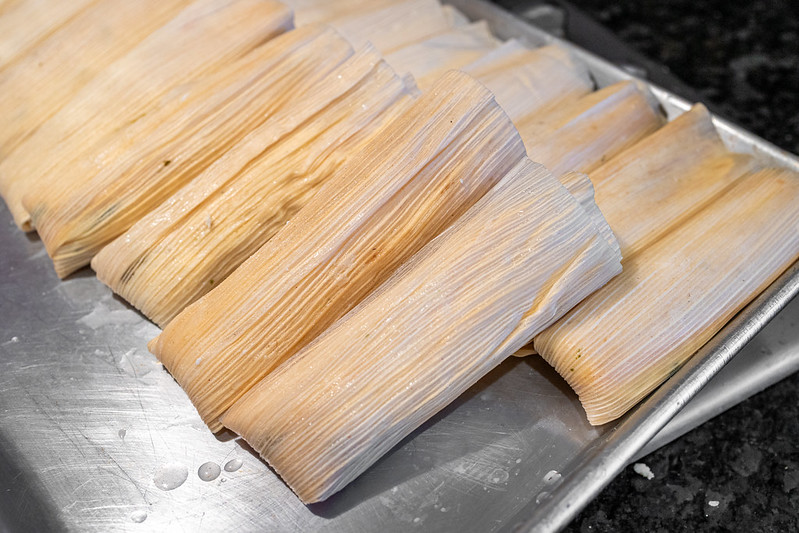
Finally, I rolled the husk closed in a manner that attempted to totally surround the filling in masa, then I folded the skinny, unstuffed end of the husk up to keep the tamal closed. This thicker masa mixture really let me speed through production faster than I could with the thinner version, and I had two dozen tamales assembled from my single batch of masa before I was expecting to be done. I had a lot of filling ingredients left, so I actually made another batch of masa and assembled another dozen tamales before moving on to steaming.
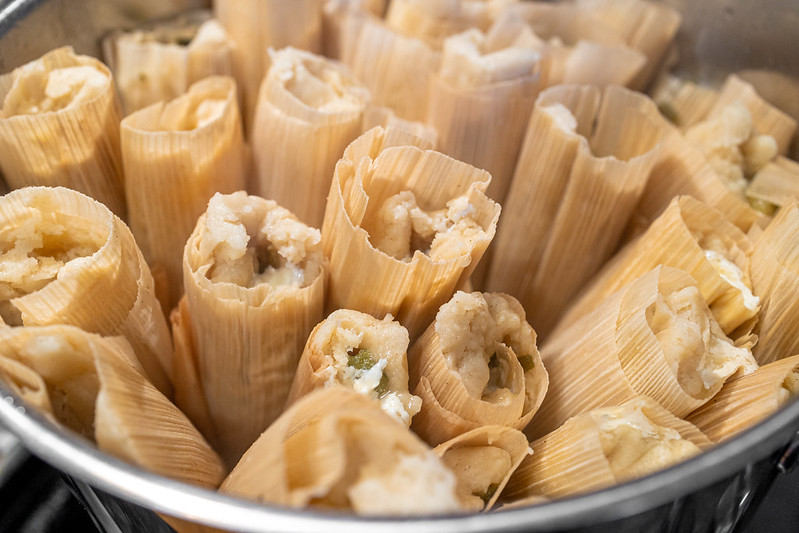
I used my stockpot for steaming, with a little over an inch of water and steamer inset. I stuffed all three dozen tamales in there, situated vertically to keep the masa from spilling out during cooking. I then turned on the heat, covered, and let these steam until done, which took about 45 minutes. After letting them cool a bit, I taste tested one and froze the rest because they were destined to be eaten at a Meatwave that was still two weeks away.
To reheat, I merely stuffed all the tamales back into the steamer and let them go until warmed throughout. They tasted the same reheated, and that was still certifiably delicious. I worried the masa wouldn't hold up without the lard, but it was still rich and satisfying, with a texture that was an ideal balance between airy and tender with a little chew to it. I knew the cheese and pepper combo was going to be to my liking, but the Anaheims really upped the game in my opinion because they delivered just enough heat to make these taste more satisfying than my previous ones. It almost made up for the loss of the fresh masa, but still, if you have a source for that, definitely get it because as great as these tamales were, I know they could have been just that much better with a masa that delivered a fresher and more pronounced corn flavor.