Grilled BLTs

I'll state a probably pretty unpopular opinion—I'm not a big BLT fan. Well, I should probably clarify that, I'm not a big BLT fan most of the year. When a sandwich features only three primary ingredients, all of them need to be on point, but off-season flavorless and mealy tomatoes render BLTs totally unappealing to me and I stay clear. For the two to three months of tomato season though—when the fruit is irresistibly sweet, acidic, and juicy—a BLT is pretty close to sandwich perfection. So it seemed fitting to share my recipe for a grilled BLT while we're still in prime tomato season and I'm enjoying the summer bounty to its fullest.

Once tomatoes begin to be properly ripe, which is mid- to late-July here in Durham, I make weekly trips to farmer's market to get more than my share of tomatoes while they're at their best. I often don't pay too much attention to the varieties because it seems like no matter what I get, there's something to love about all of them. For these particular BLTs, I used an heirloom variety that had a good balance between sweet and acidic with a lot flesh that helped them make these sandwiches as hearty as possible.
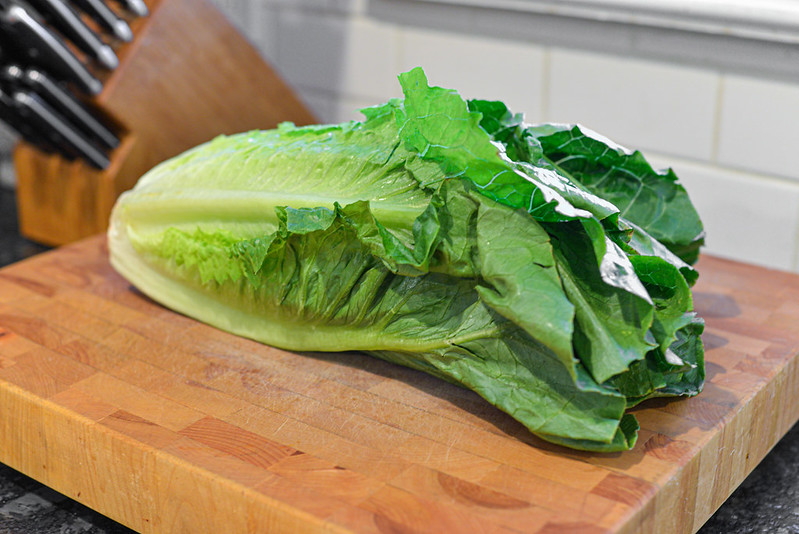
While I'm not the biggest BLT fan, my wife is, and she has definite opinions on what makes the best BLT. For lettuce, she's a crispy iceberg type of person, but I personally like the more tender, dark green lettuces. Romaine seems to be the right compromise to get us each to our ideal sandwich—I used the crunchier, lighter green portion by the core for her, and the ends of the leaves for me.
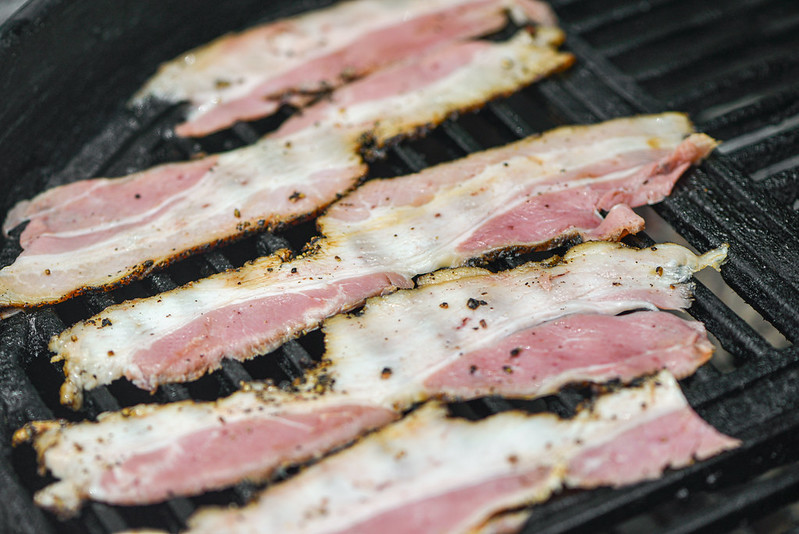
You may have wondered from the out-start—why bother using the grill for a BLT? Well, my main answer would be for the bacon. Bacon is inherently giving and cooks up incredibly well using all sorts of methods. For me, the grill has two distinct advantages in that you can cook a whole lot at once, and it avoids that lingering bacon smell that can persist for days after making it on the stovetop. To cook bacon on the grill, I arrange a fresh batch of lit coals in two piles on either side of the charcoal grate and nestle a foil pan between them to catch grease to prevent flare-ups. I then lay bacon strips over the pan, cover, and cook, flipping the strips a few times for even doneness.
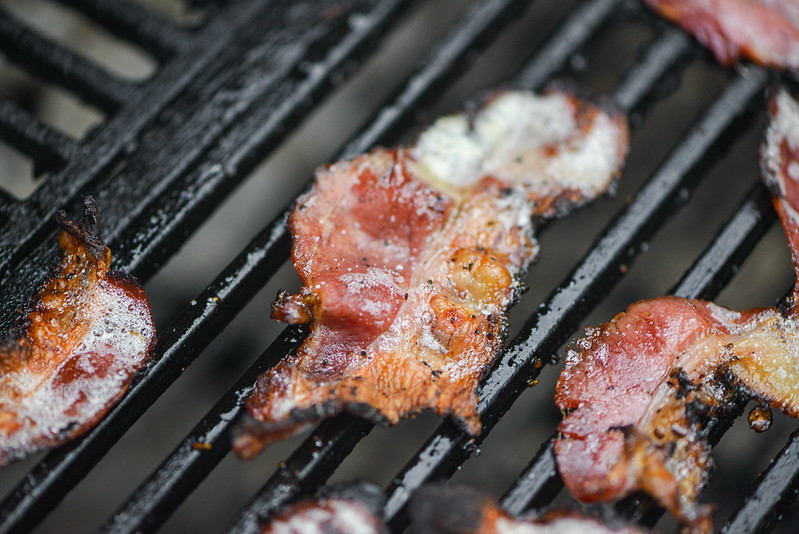
For this particular BLT, I utilized my own homemade peppered bacon, which leveled up the end sandwich in my opinion. I had been reluctant to make my own bacon for a long time, but with an initial successful result, I recommend giving it a try—if you want to use homemade bacon in your BLTs, you just need to plan about a week ahead for the curing, smoking, cooling, and slicing required. I cut my bacon to a standard thickness because I find the thinner slices are more likely to be crisp and brittle, avoiding thicker bacon that may not break upon bite and results in whole strips that slide out of the sandwich when you're trying to eat it.

As each slice of bacon turned a deep mahogany color, I removed them to a paper towel lined plate. Giving the bacon a few minutes the rest is an important step to wick away some excess grease and let it crisp up completely, which happens while it cools. Pro-tip here, make more bacon than you think you need because it's impossible to resist eating some during the wait for every slice to cook and cool.
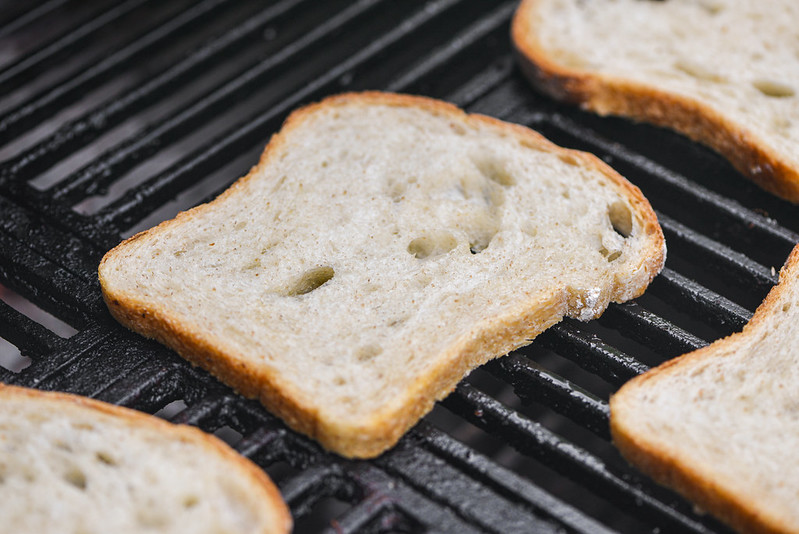
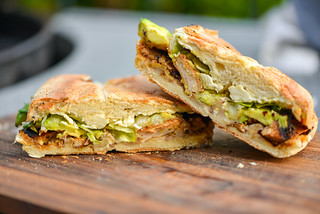
Once the bacon was done, I still had a pretty hot fire going, so I used the grill to toast the bread. Before doing so, I buttered one side of each slice of bread, and then put the buttered side down over indirect heat. I then covered the grill and let the bread toast until it was lightly browned and a crisp on the outside, but was still pleasingly soft on the inside—I hate the way overly crisp bread can tear up the roof of my mouth.
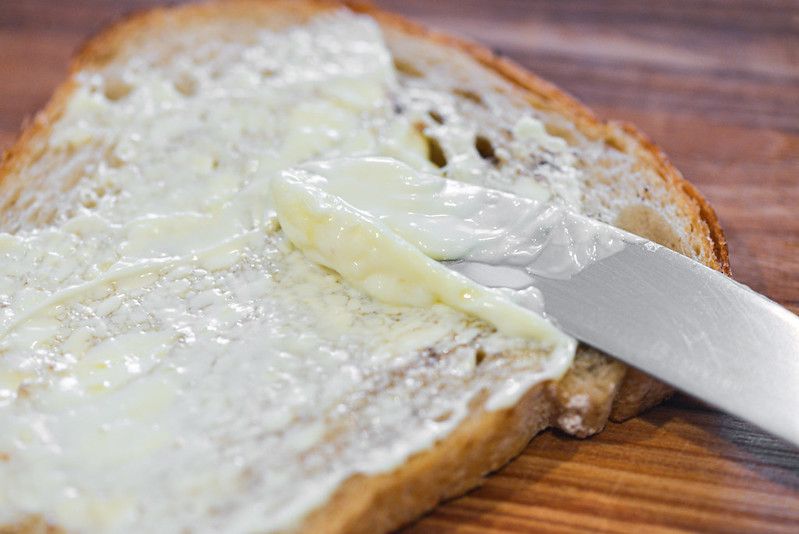
Now I had all the ingredients prepped and it was time to move on to the very important construction process. First, both pieces of bread needed to be slathered with mayo. I love mayonnaise, so this is my usually method for any sandwich, but with a BLT it's even more important because the mayo can help keep tomato and lettuce moisture from soaking through the bread and making it soggy.

After the mayo, a layer of lettuce came next, followed by the tomatoes. I don't like tomato overload, so a couple thick slices work for me to deliver the flavor needed while keeping the sandwich a manageable size. It's important before moving on to the next step to give those tomatoes a sprinkle of salt and pepper for seasoning.

Now on went the bacon, and three to four slices felt right. I like to lay one layer of bacon perpendicular to the other. After the bacon was on, another bed of lettuce was called for, followed by the top slice of mayo-laden bread to complete the sandwich.

And to me, this is a summer sandwich at its best. To start, there's no other time of year you can get such great tomatoes, but then using the grill just heightens the seasonal nature of the BLT, not so much in the flavor department, but as a way to be outside and by the grill. Each bite of this sandwich reminded me why summer is so awesome as the tomatoes released their sweet and acidic juices that were contrasted by the salty and meaty bacon along with the extra fresh crunch of lettuce and satisfying creamy mayo. It's going to be sad a day when I'm no longer going to be able to enjoy BLTs in a few weeks time, but the wait until next summer will be well rewarded with more of these sandwiches that are so simply perfect.